Git Overview Part 1
📺 Git Overview - Part 1
This comprehensive guide covers the basics of Git and GitHub, from installation to your first push.
📌 Topics Covered
- What is Git
- How to create GitHub account
- How to create GitHub public repository
- How to install Git in Linux operating system (Ubuntu)
- How to clone (download) the repository from GitHub to local computer
🤔 What is Git?
Git (Global Information Tracker) is a powerful and widely-used version control system commonly used for software development and other collaborative projects.
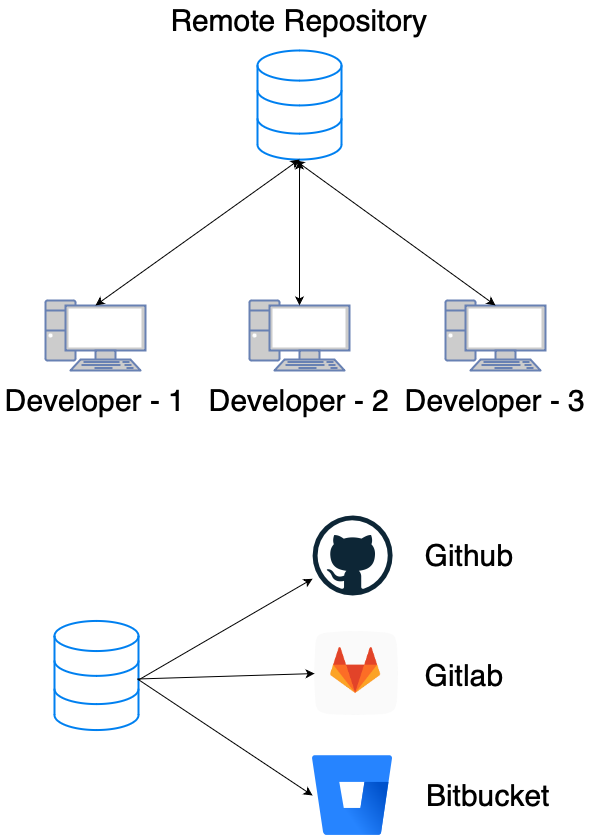
The model here is pull and push.
Let's say, Developer 1 created a file file-1 in their local computer and pushed that file to the Remote repository.
Now Developer 2 and 3 can pull file-1 from the remote repository to their local computers.
Similarly, if Developer 3 created a file file-3 locally and pushed it to the Remote repository, other developers can get file-3 by pulling.
📝 Create GitHub Account
GitHub is a cloud platform for hosting Git repositories. Git is the command line utility installed on your computer.
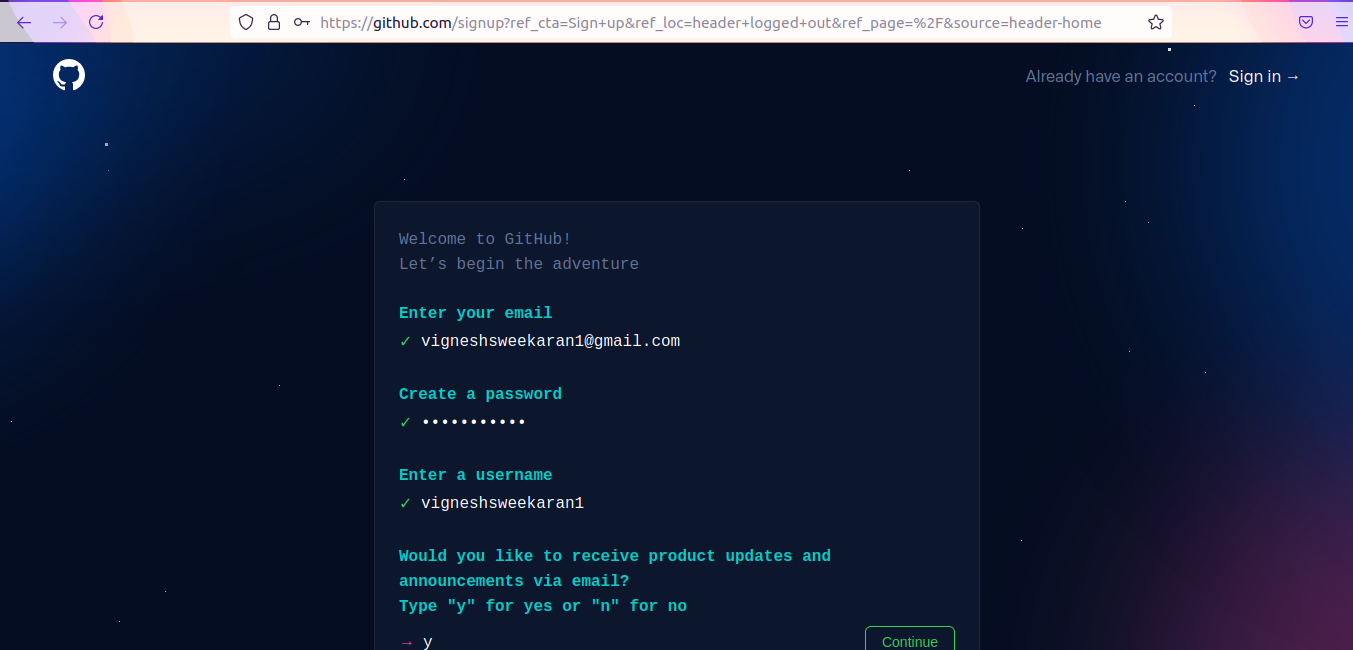
- Go to https://github.com.
- Click on Signup.

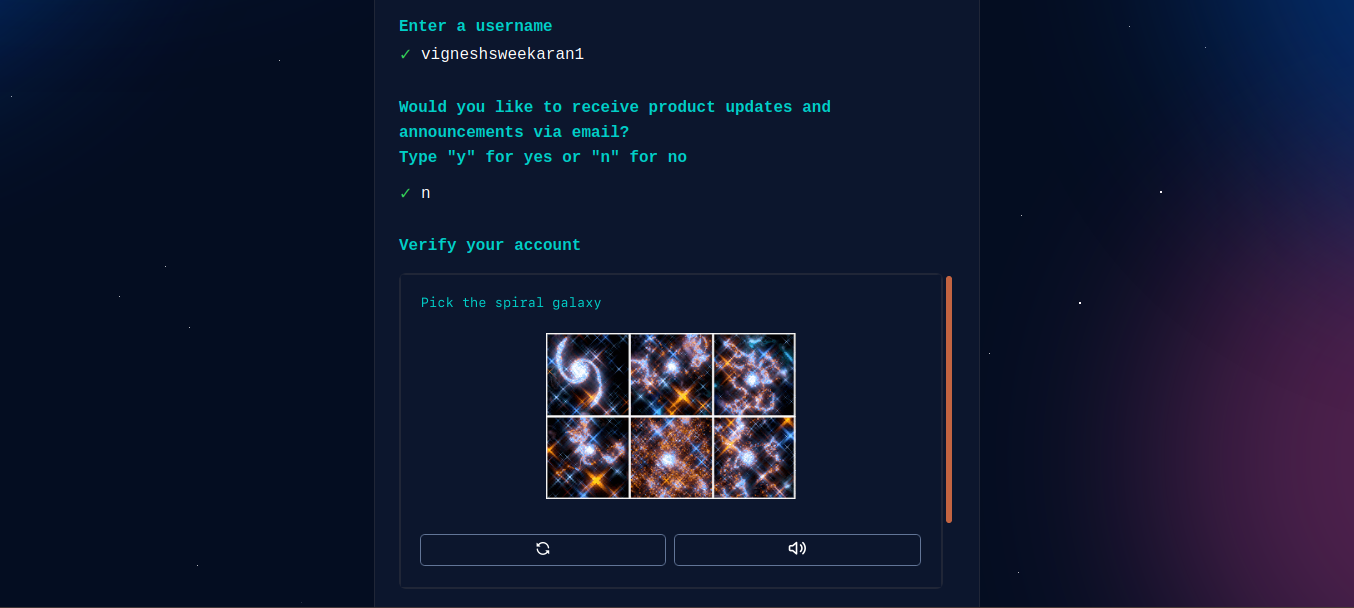
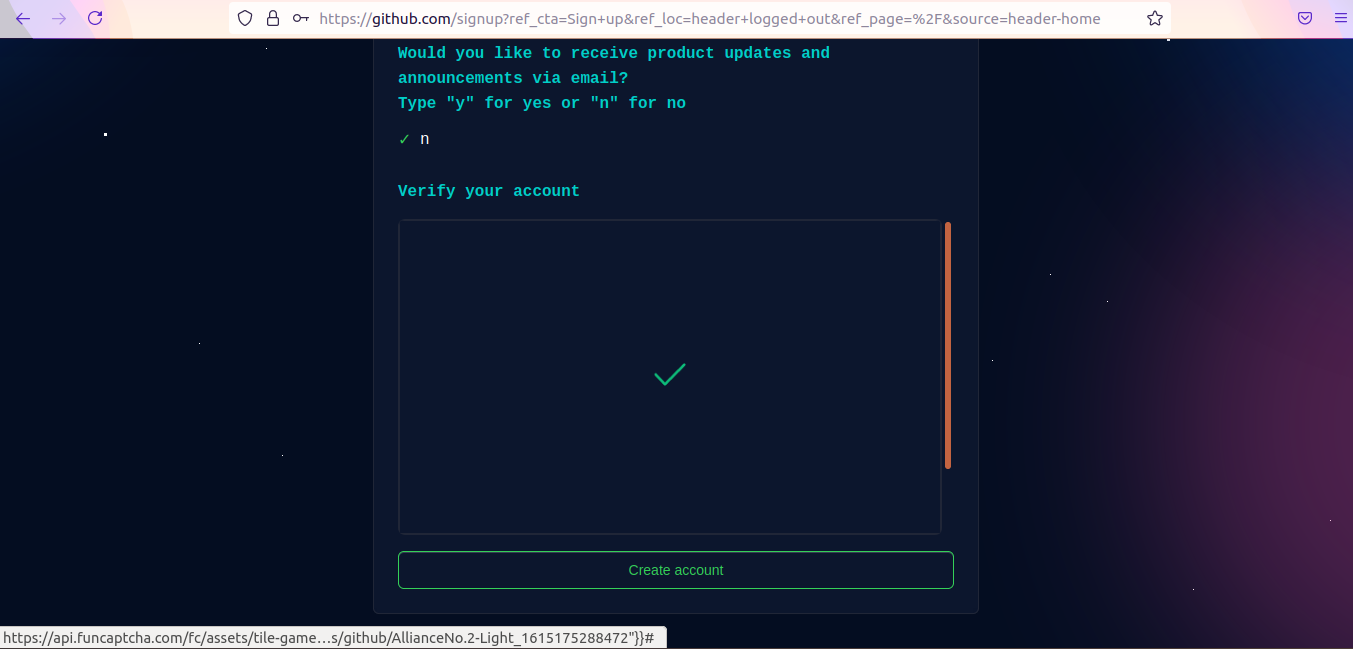
- Enter your
email id,password,username, verify the puzzle, and click on Create account. - You will receive a verification mail with a link in your inbox.
- Click on the link received in your mail to complete the email verification. Once completed, login to https://github.com.
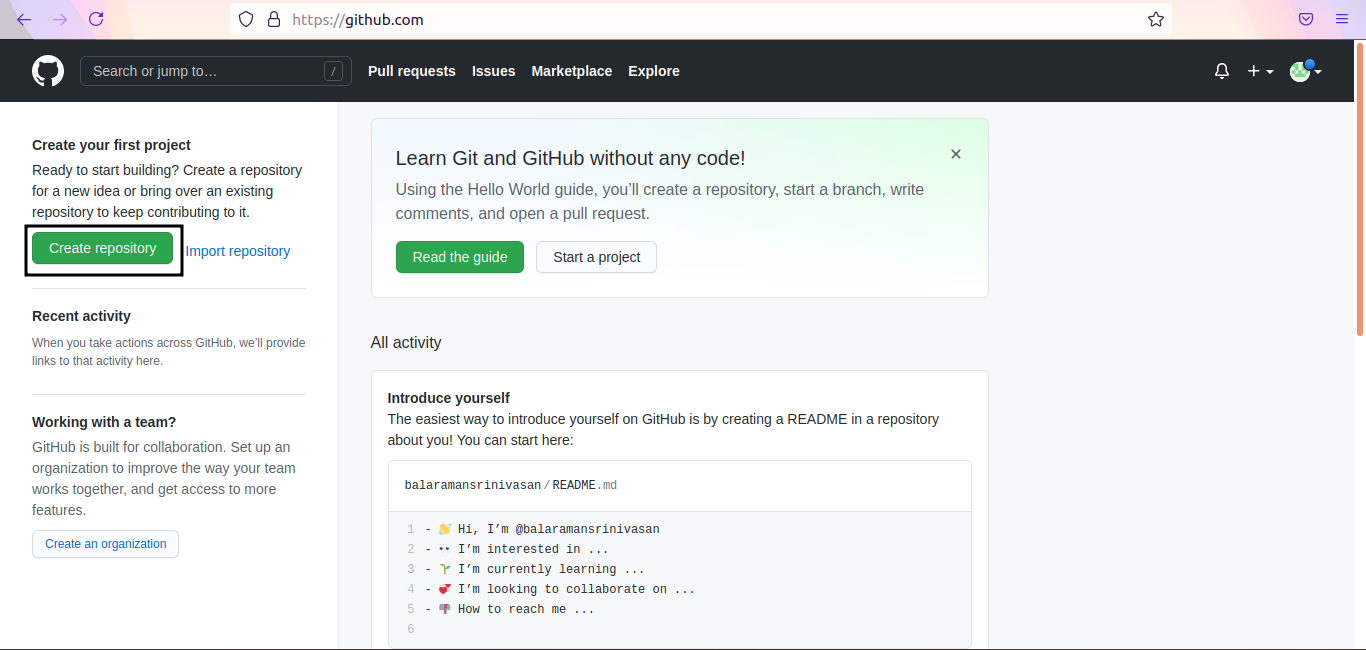
📂 Create Public Repository
After login, click on Create repository to create your first repository in GitHub.
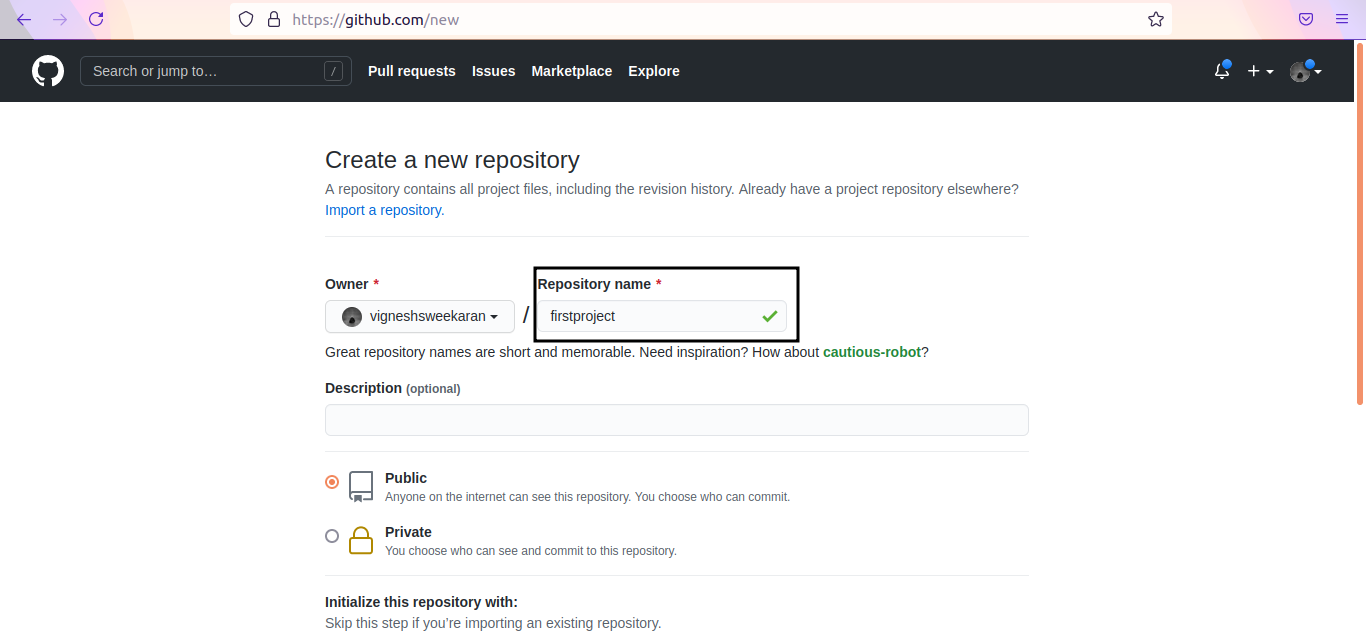
- Enter the repository name e.g.,
firstproject. - Select the repository type as Public or Private.
- Public: Anybody can see the repository and clone your project.
- Private: Only visible to you and collaborators.
- Check the box Add a README file.
README.mdis used to describe your repository and its purpose.
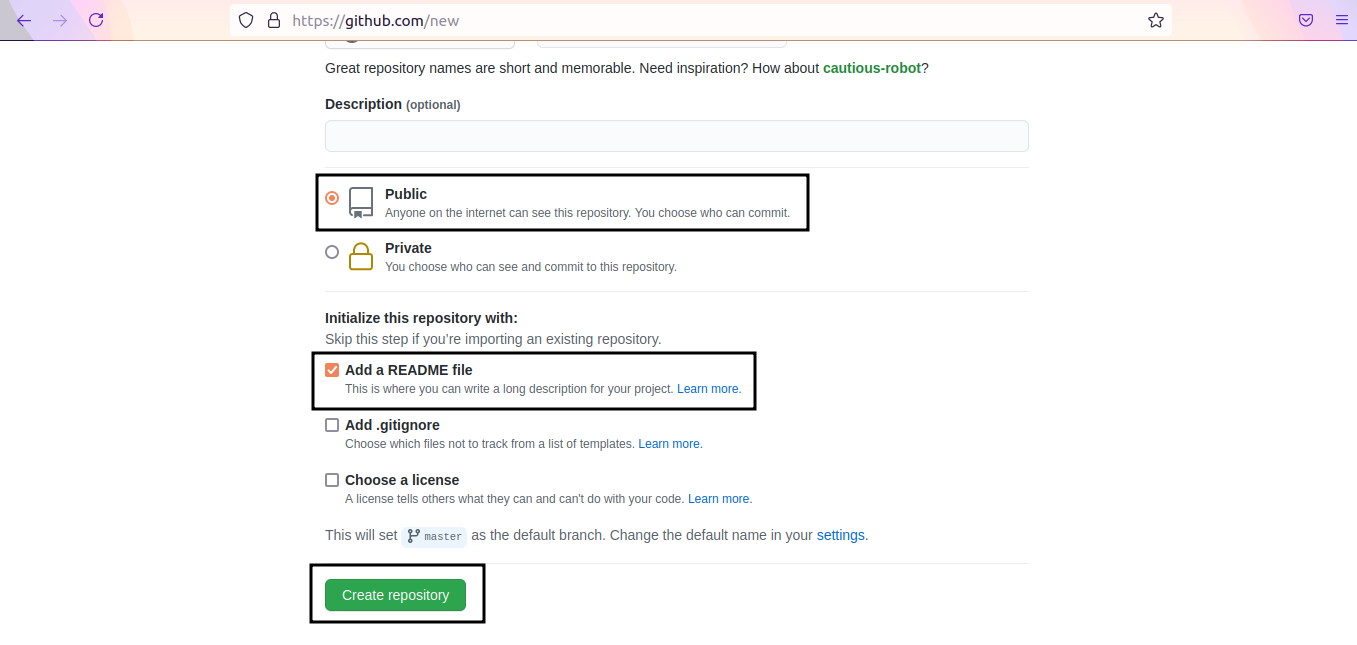
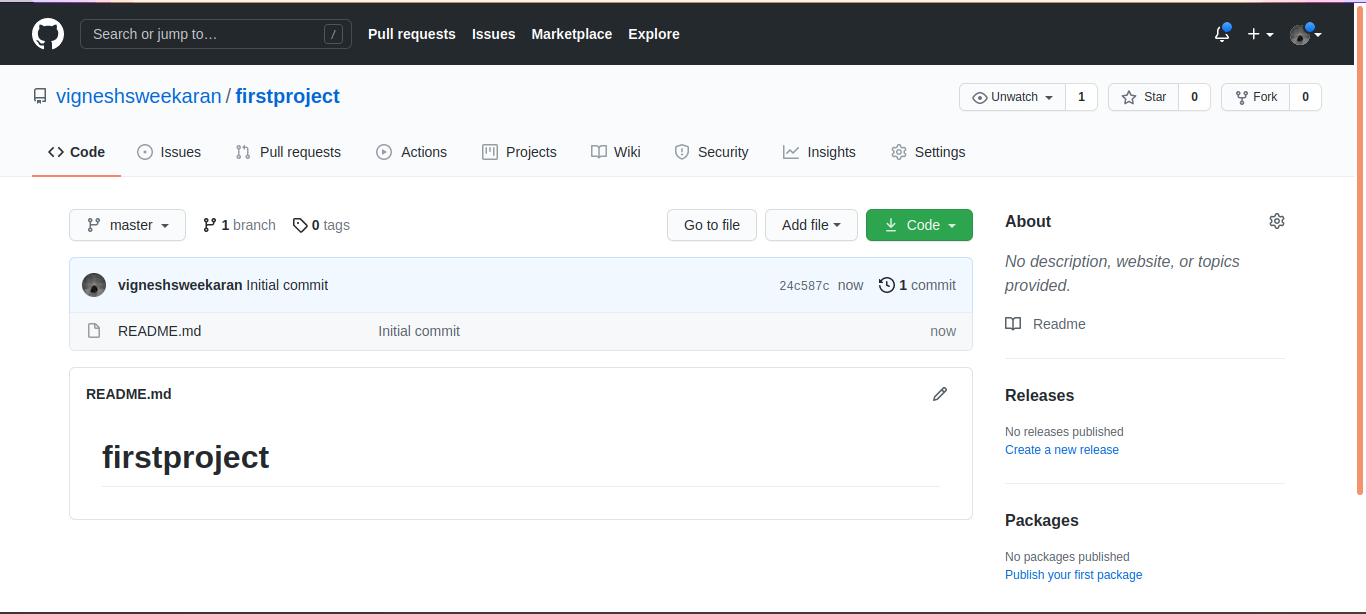
- Click Create repository. The content in your
README.mdwill be shown on your repository home page.
🐧 Install Git on Linux
Ubuntu
Run the following command to install git in Ubuntu:
sudo apt update
sudo apt install git -y
CentOS
Run the following command to install git in CentOS:
sudo yum update -y
sudo yum install git -y
Verify Version
git --version
📥 Clone Repository
Go to your repository -> click on Code -> make sure HTTPS is selected -> copy the URL.
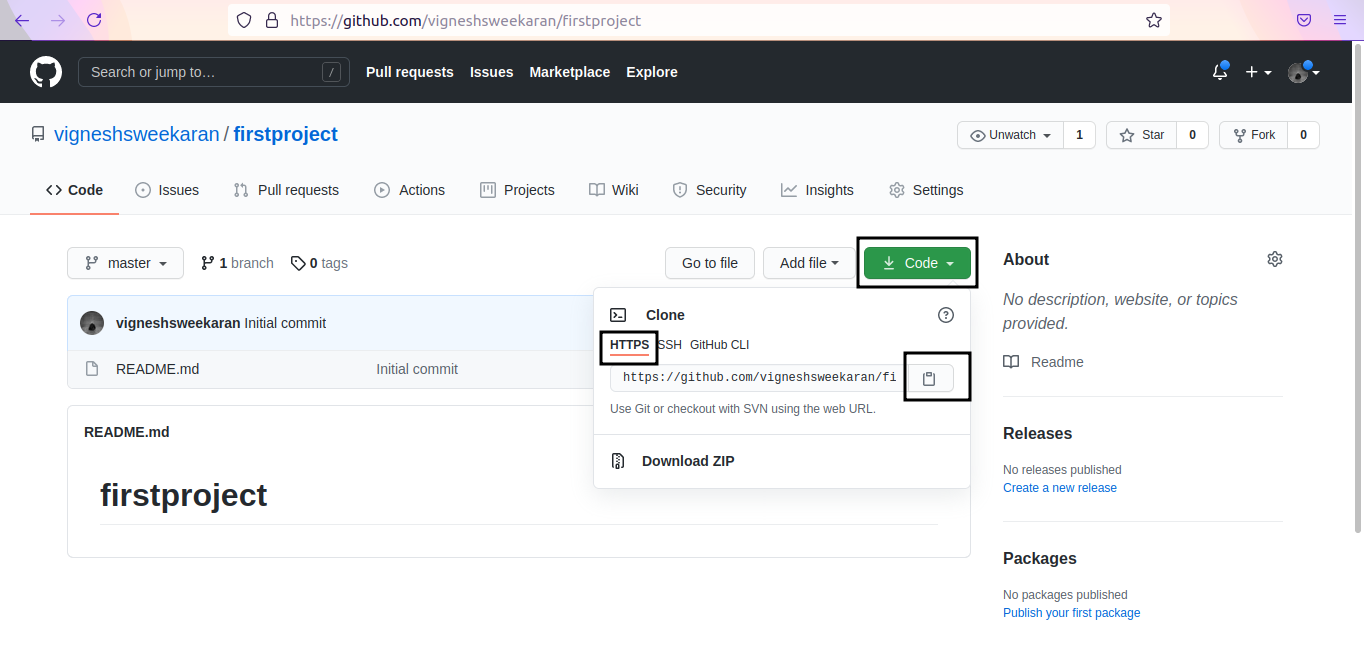
In your terminal, type git clone followed by your copied URL:
git clone https://github.com/vigneshsweekaran/firstproject.git
Now you have successfully cloned the repository to your local computer.
💻 Making Changes & Pushing
1. Clone the repository
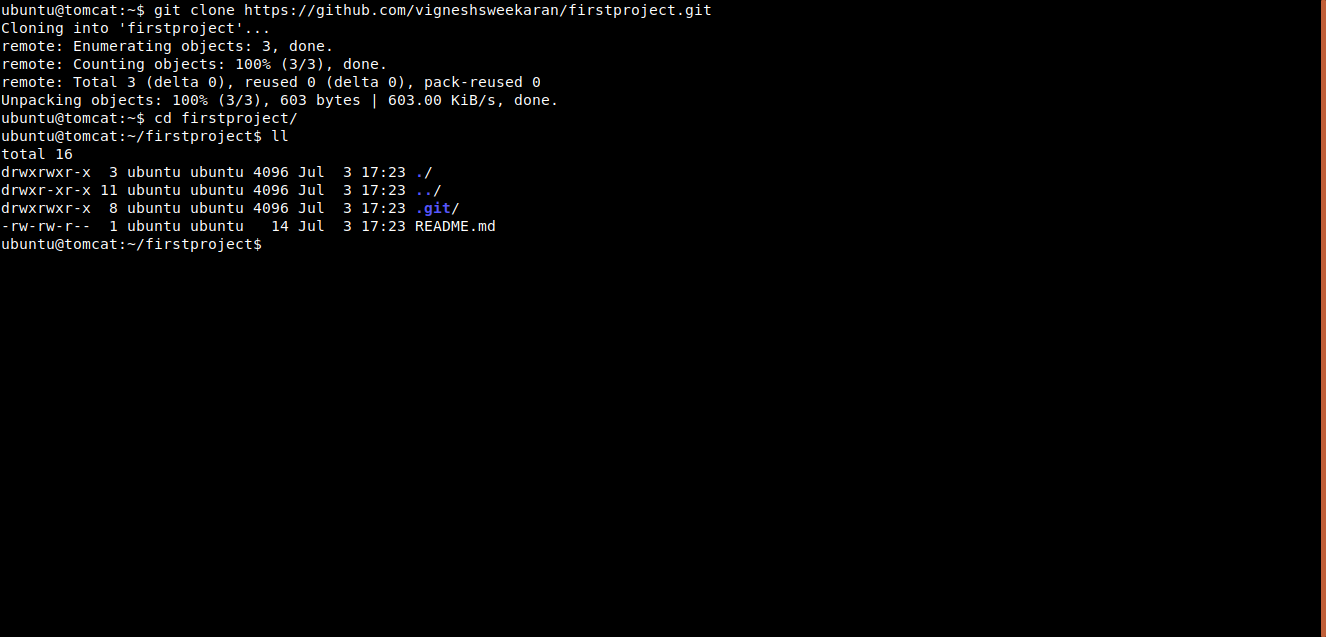
Let's clone the repository (if not already done) and see the output:
ubuntu@manikandan:~$ git clone https://github.com/devopspilot2/firstproject.git
Cloning into 'firstproject'...
remote: Enumerating objects: 3, done.
remote: Counting objects: 100% (3/3), done.
remote: Total 3 (delta 0), reused 0 (delta 0), pack-reused 0
Receiving objects: 100% (3/3), done.
ubuntu@manikandan:~$ cd firstproject/
ubuntu@manikandan:~/firstproject$ ll
total 4
-rw-rw-r-- 1 ubuntu ubuntu 14 Jun  2 23:41 README.md
In this firstproject repository we have only the README.md file.
2. Create a new file
Let's create a new file hello.txt:
ubuntu@manikandan:~/firstproject$ echo "Created for git demo" > hello.txt
ubuntu@manikandan:~/firstproject$ ll
total 8
-rw-rw-r-- 1 ubuntu ubuntu 14 Jun  2 23:41 README.md
-rw-rw-r-- 1 ubuntu ubuntu 21 Jun  2 23:42 hello.txt
ubuntu@manikandan:~/firstproject$ cat hello.txt
Created for git demo
3. Check Git Status
Run git status to check the status of the file:
ubuntu@manikandan:~/firstproject$ git status
On branch main
Your branch is up to date with 'origin/main'.

Untracked files:
  (use "git add <file>..." to include in what will be committed)
        hello.txt

nothing added to commit but untracked files present (use "git add" to track)
It lists hello.txt under Untracked files, which means Git is not tracking this file yet. It suggests using git add.
4. Track the file (Git Add)
Run git add <FILE_NAME> to add the file to the Git index/staging area:
ubuntu@manikandan:~/firstproject$ git add hello.txt
ubuntu@manikandan:~/firstproject$ git status
On branch main
Your branch is up to date with 'origin/main'.

Changes to be committed:
  (use "git restore --staged <file>..." to unstage)
        new file:   hello.txt
Now it is tracked and ready to be committed.
5. Commit Changes
Run git commit -m "message" to save the changes to the local repository.
ubuntu@manikandan:~/firstproject$ git commit -m "Added hello.txt for git demo"
Author identity unknown

*** Please tell me who you are.

Run

  git config --global user.email "you@example.com"
  git config --global user.name "Your Name"

to set your account's default identity.
Omit --global to set the identity only in this repository.

fatal: unable to auto-detect email address (got 'ubuntu@manikandan.(none)')
The command has failed because the author identity is not configured. Git needs to know who is making the changes.
6. Configure Identity
This is a one-time configuration per server (stored in ~/.gitconfig).
ubuntu@manikandan:~/firstproject$ git config --global user.email "devopspilot2@gmail.com"
ubuntu@manikandan:~/firstproject$ git config --global user.name "Vignesh Sweekaran"
Verify the configuration:
ubuntu@manikandan:~/firstproject$ git config -l --global
user.email=devopspilot2@gmail.com
user.name=Vignesh Sweekaran
7. Retry Commit
Now that identity is configured, run the commit command again:
ubuntu@manikandan:~/firstproject$ git commit -m "Added hello.txt for git demo"
[main d26925d] Added hello.txt for git demo
 1 file changed, 1 insertion(+)
 create mode 100644 hello.txt
This has successfully committed the changes to the local repository.
8. View History
To see the commits, run git log:
ubuntu@manikandan:~/firstproject$ git log
commit d26925de77c593d4ac7dafaa07923d2f4a74f55a (HEAD -> main)
Author: Vignesh Sweekaran <devopspilot2@gmail.com>
Date:   Sat Jun 3 00:00:53 2023 +0000

    Added hello.txt for git demo

commit 12664f9c74d52f466c2091515e54d2fa2a184647 (origin/main, origin/HEAD)
Author: devopspilot2 <134018546+devopspilot2@users.noreply.github.com>
Date:   Mon May 22 18:26:49 2023 +0800

    Initial commit
9. Push to GitHub
Now it is time to push the changes to the Remote Repository (GitHub).
Run git push origin main. It will ask for username and password.
Note: You cannot use your GitHub account password. You have to generate a Personal Access Token (PAT).
Generating a PAT: 1. Click your profile photo -> Settings.
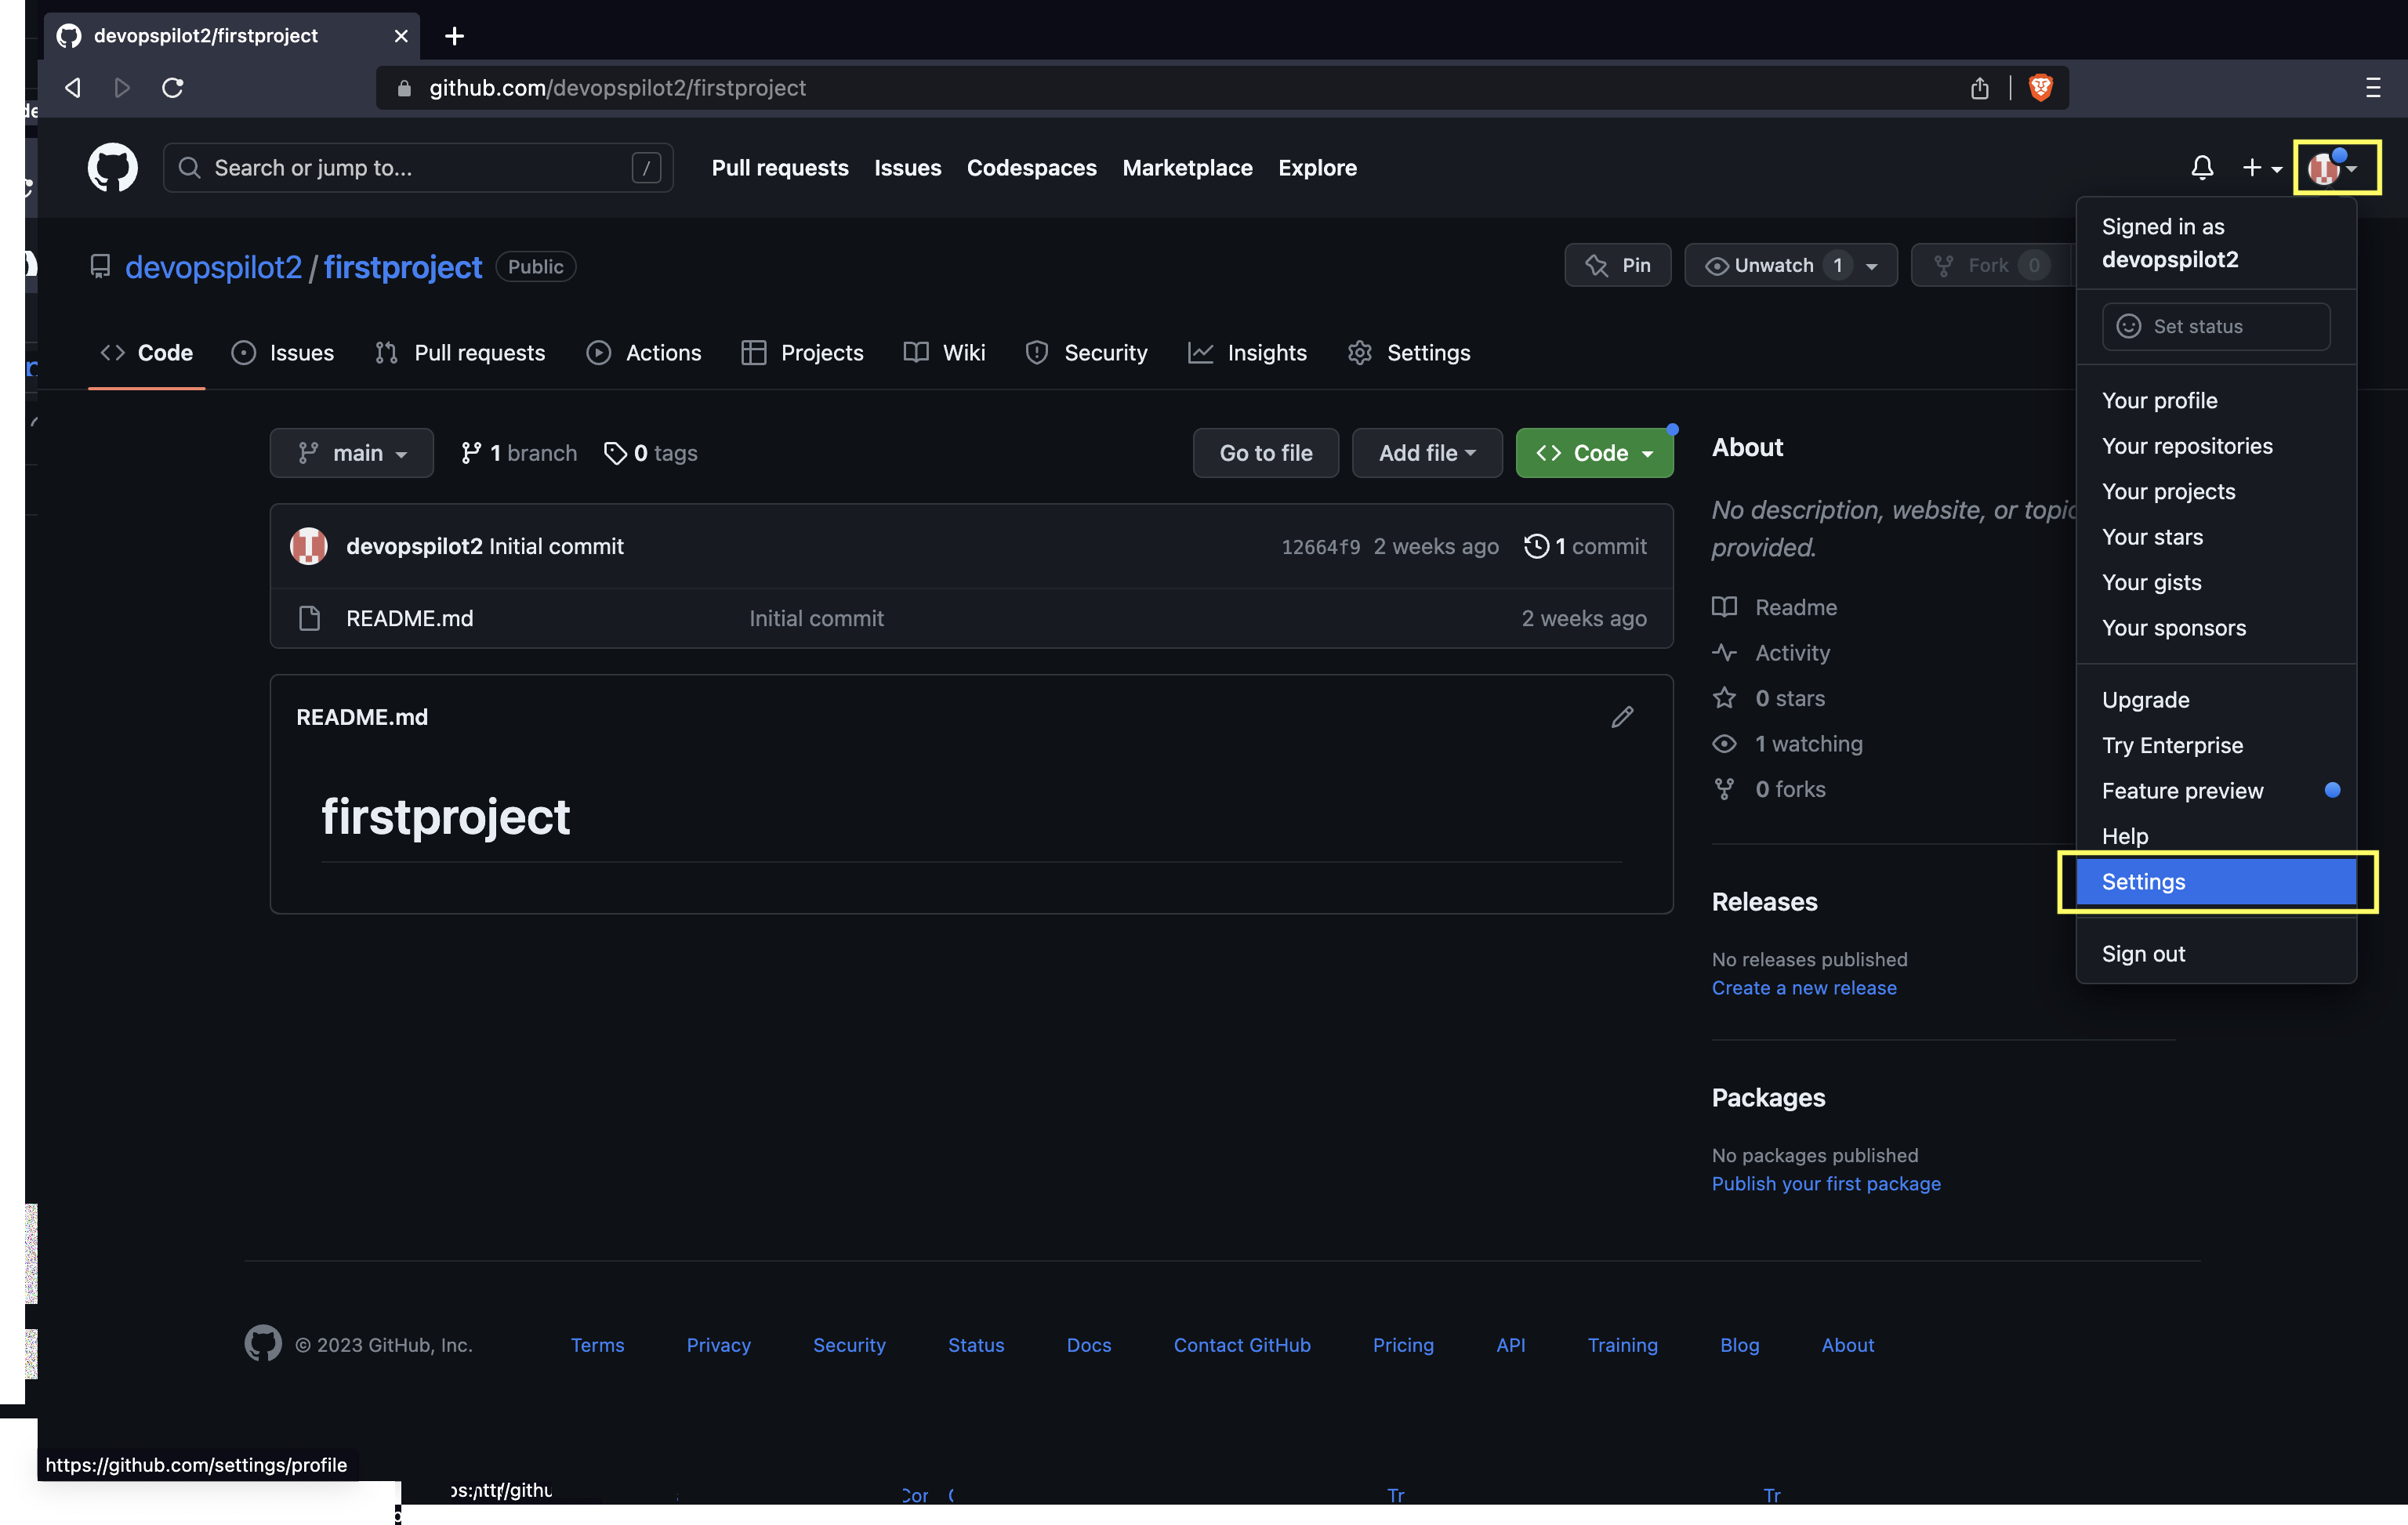
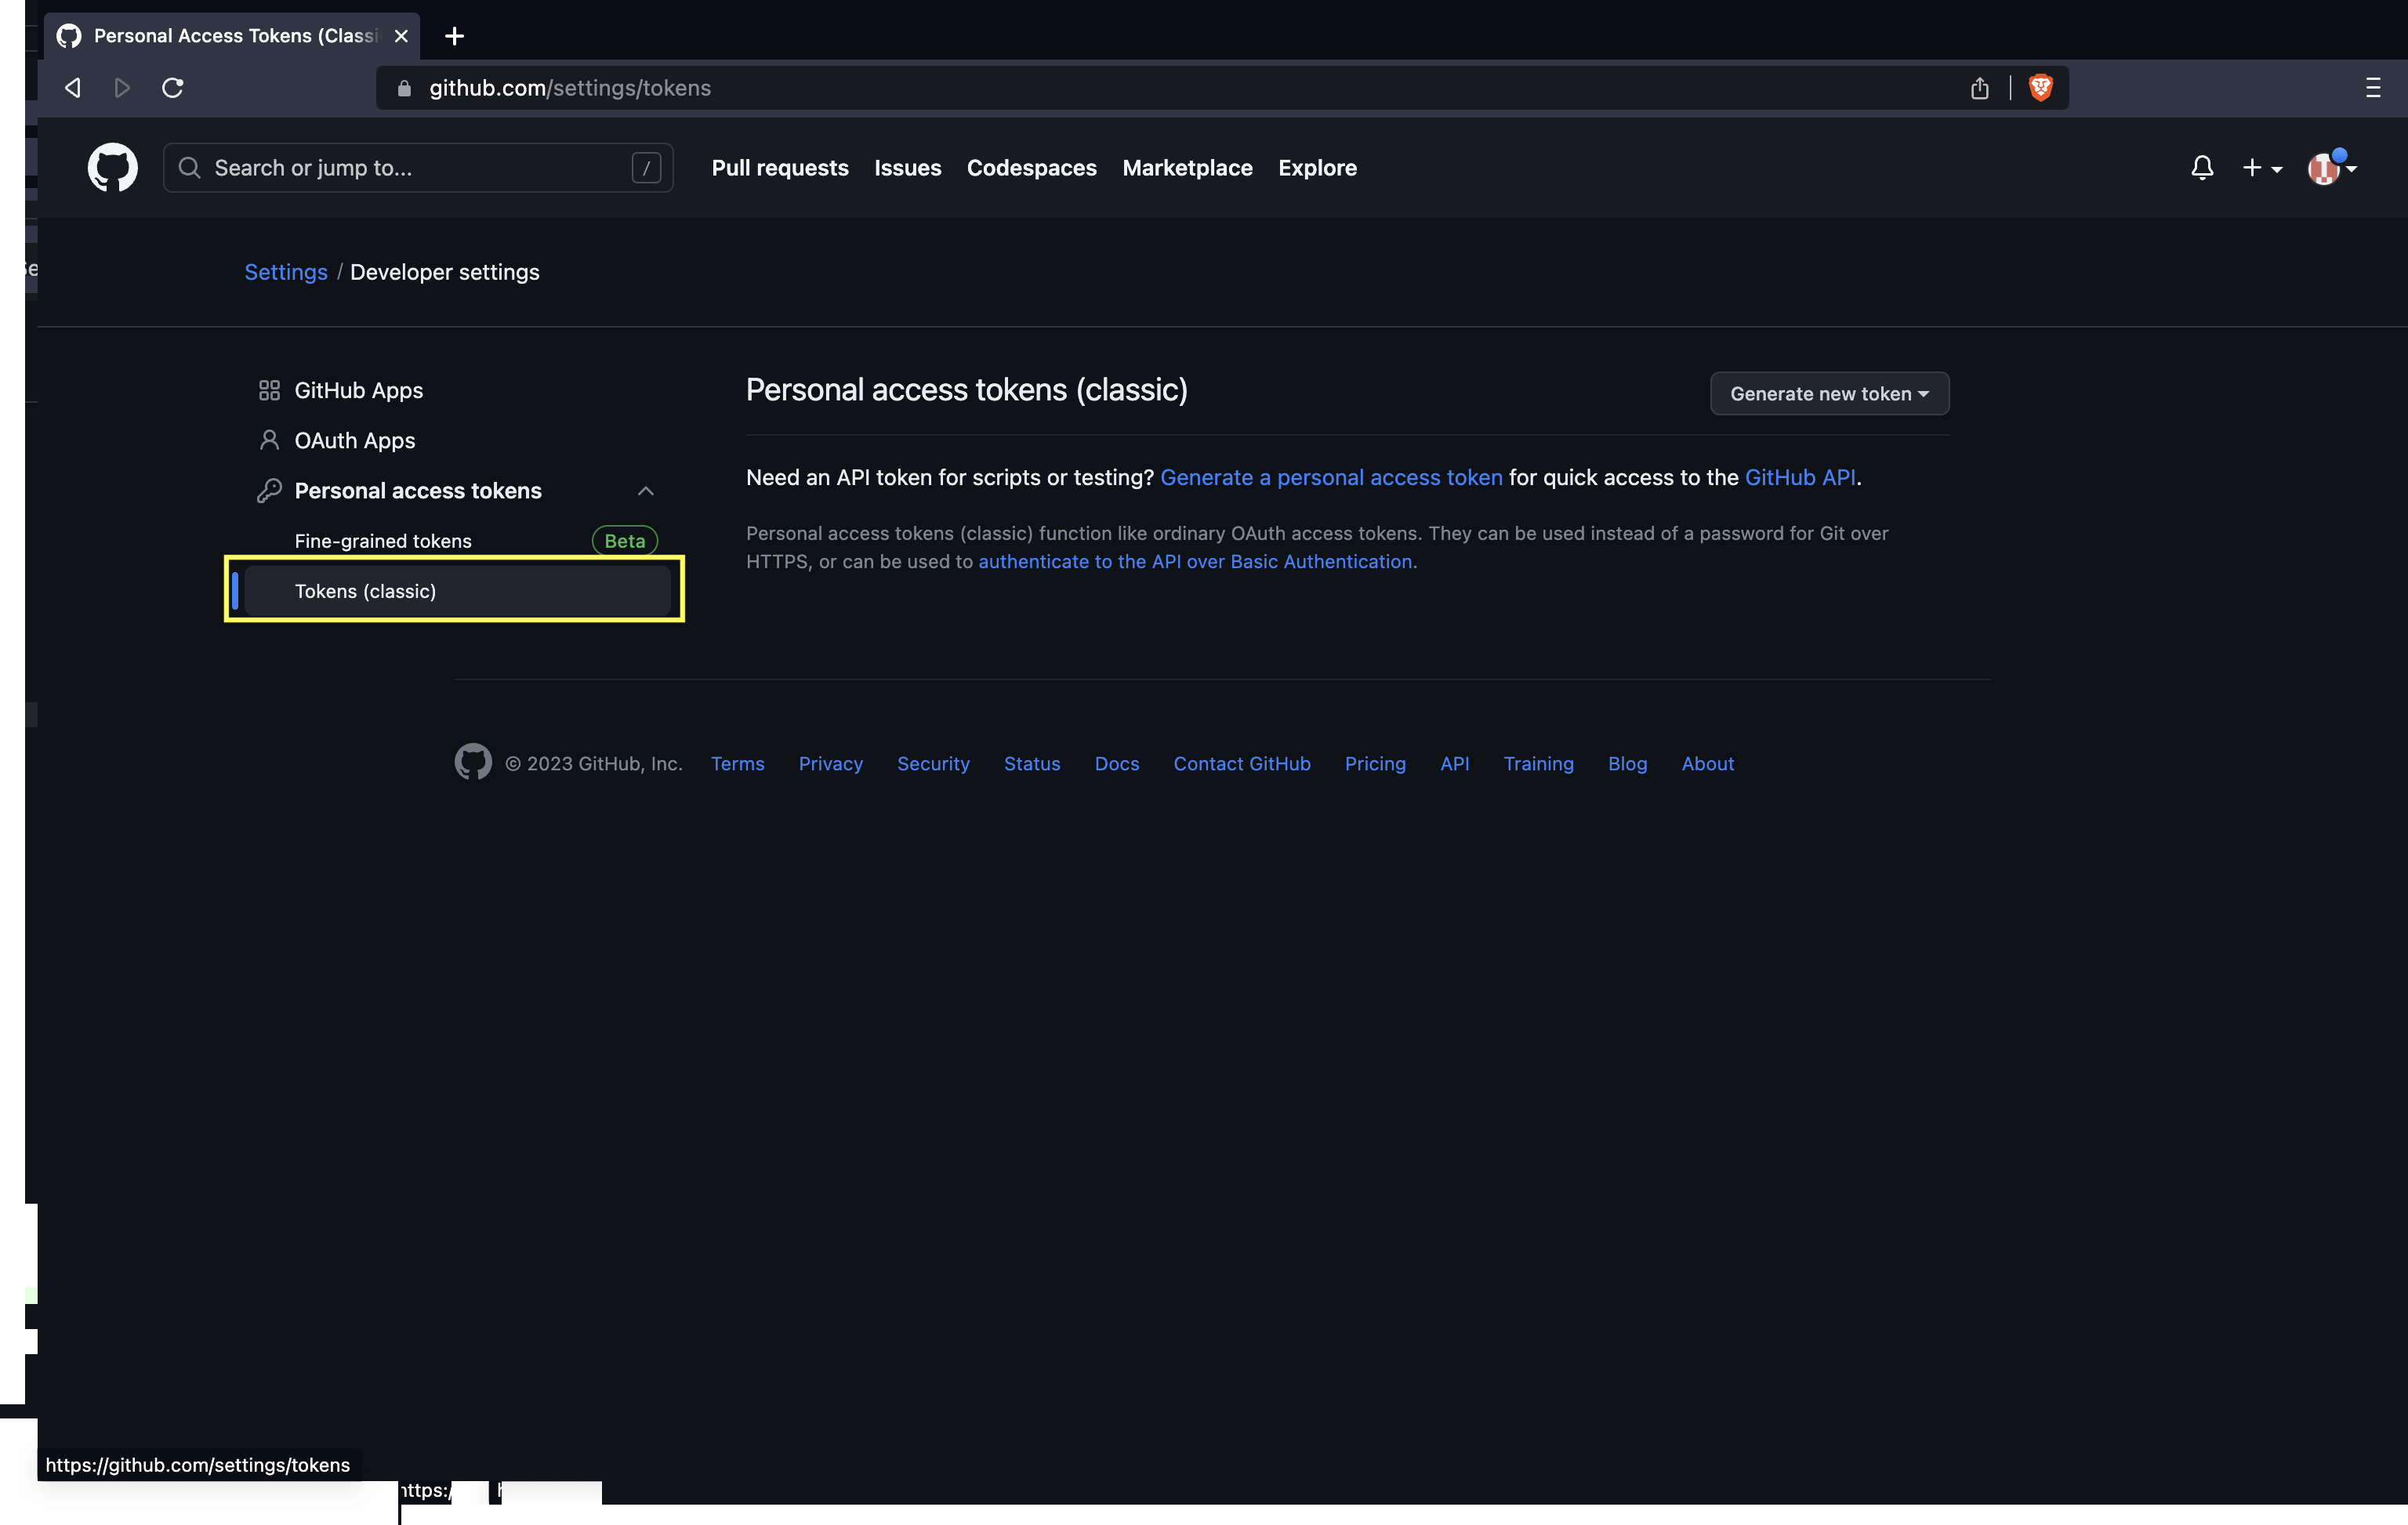
- Click on Developer settings.
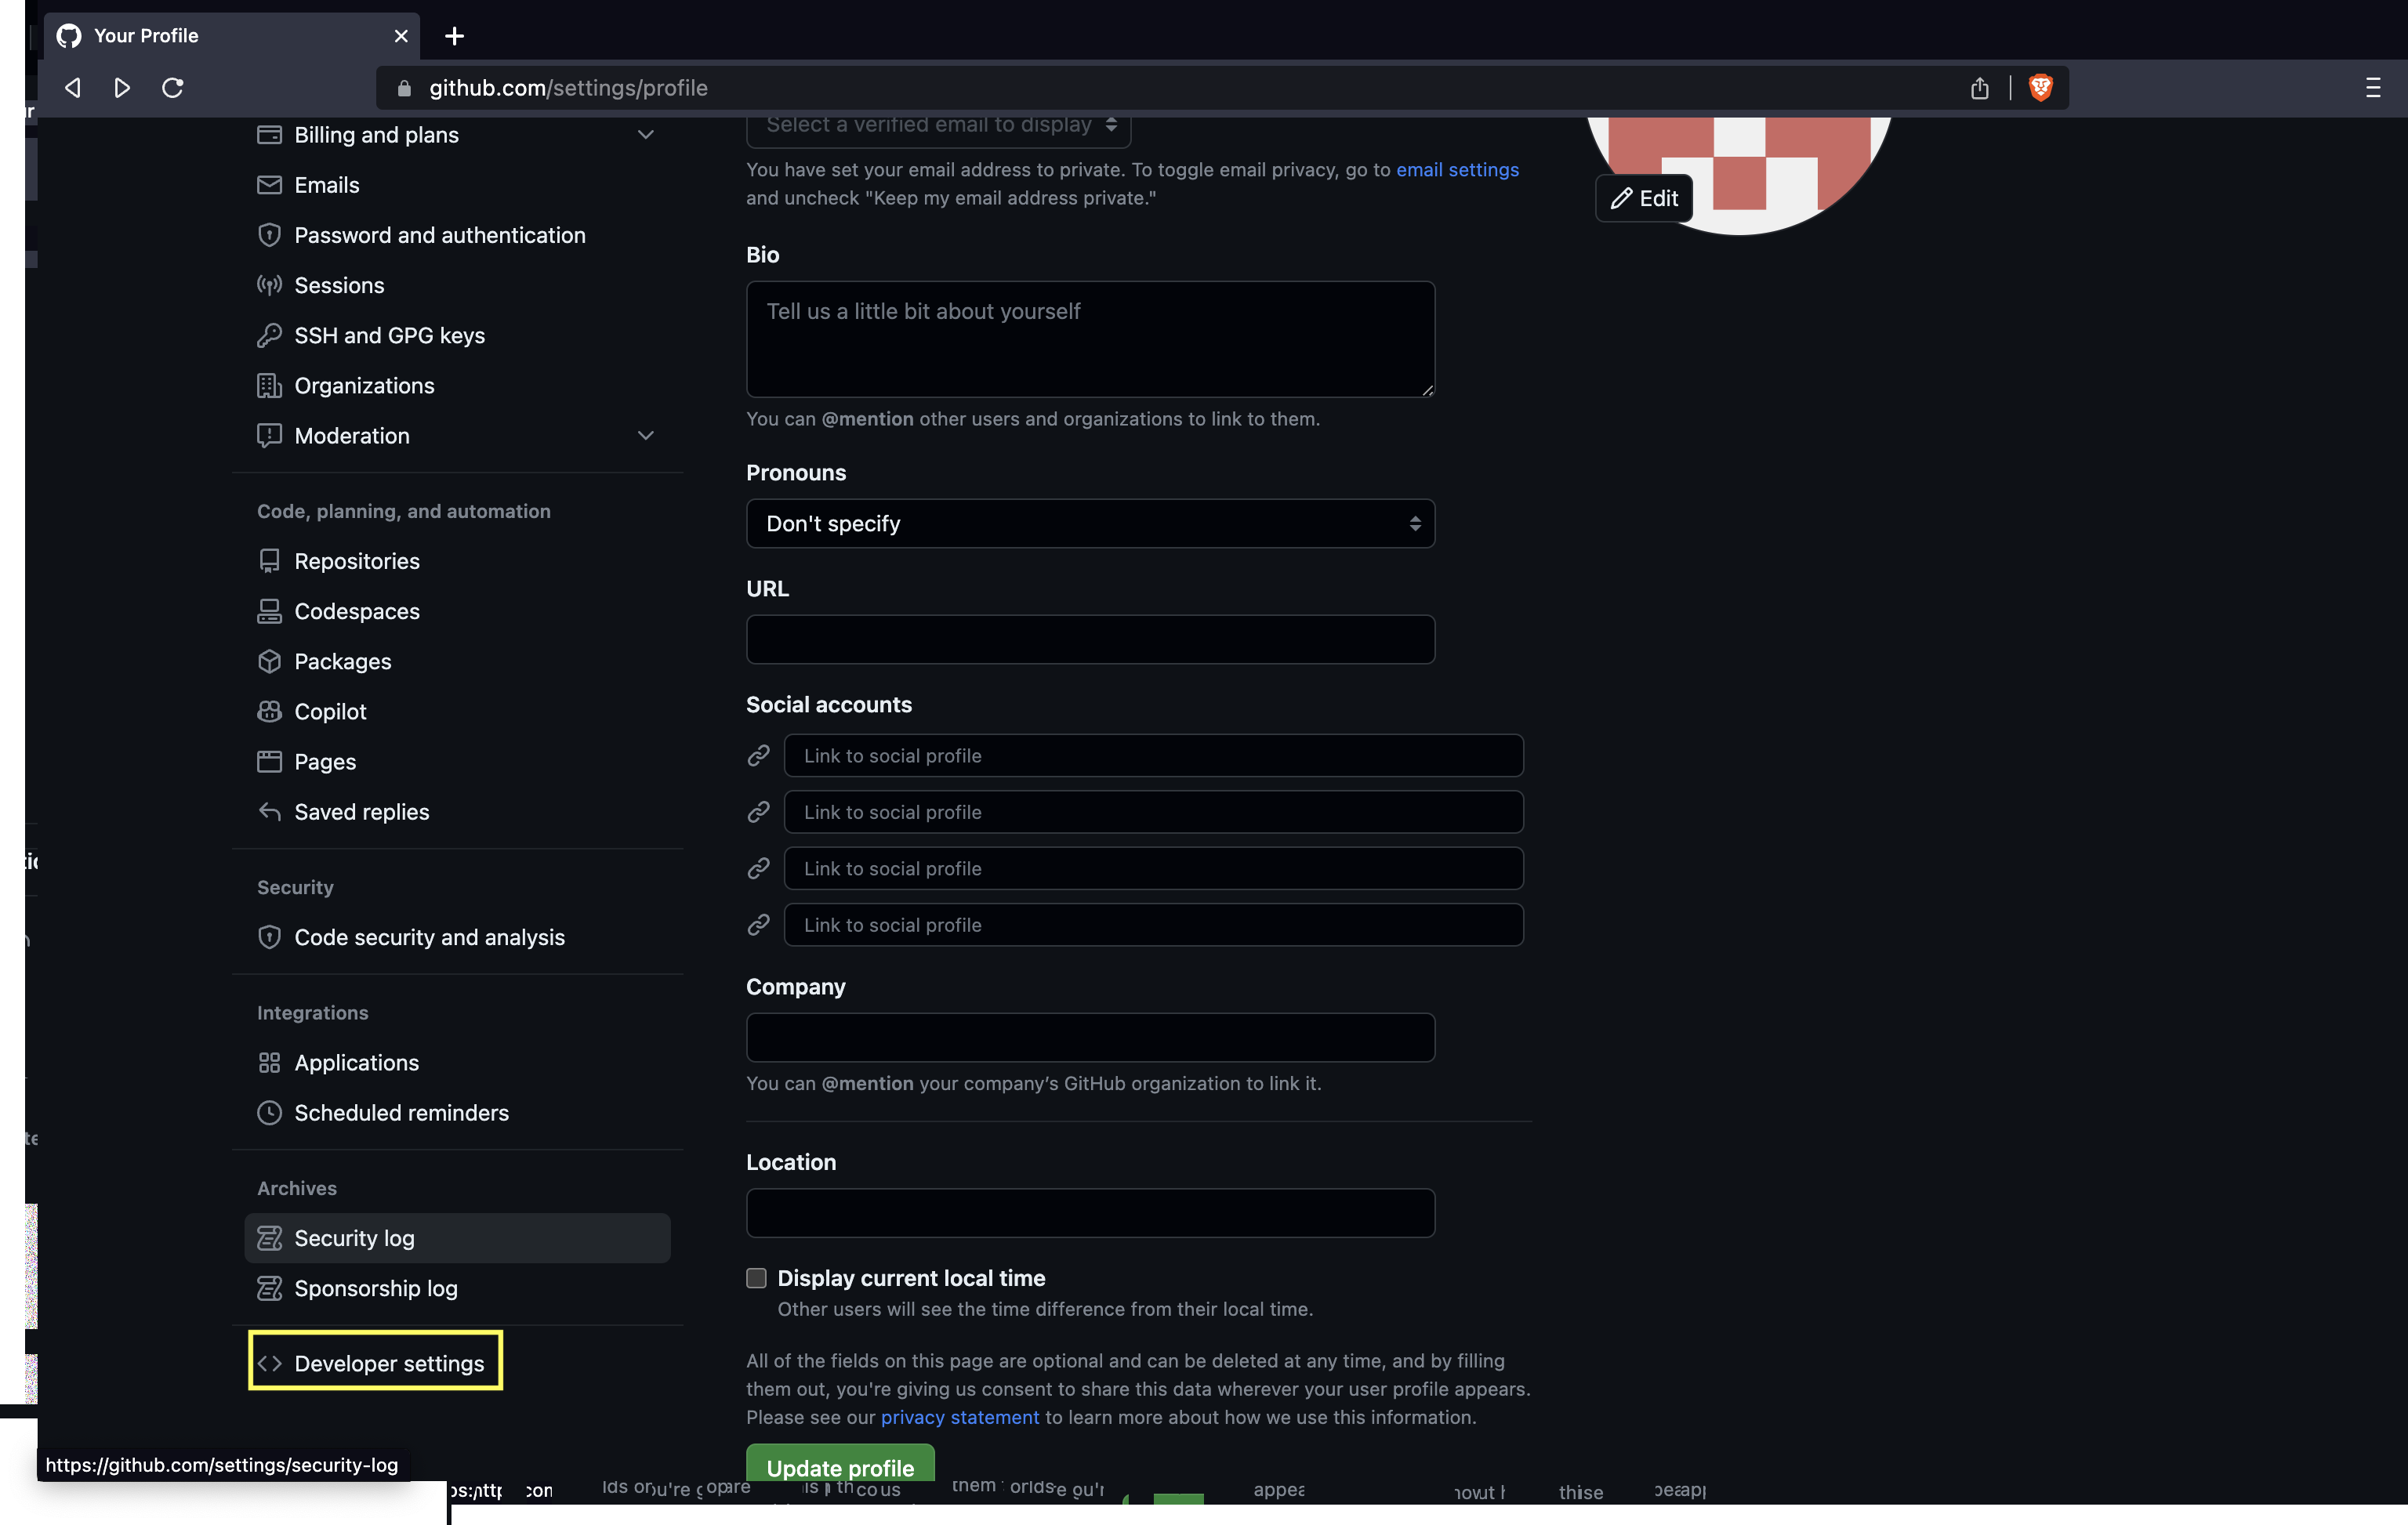
- Click on Personal access tokens and then Tokens (classic).
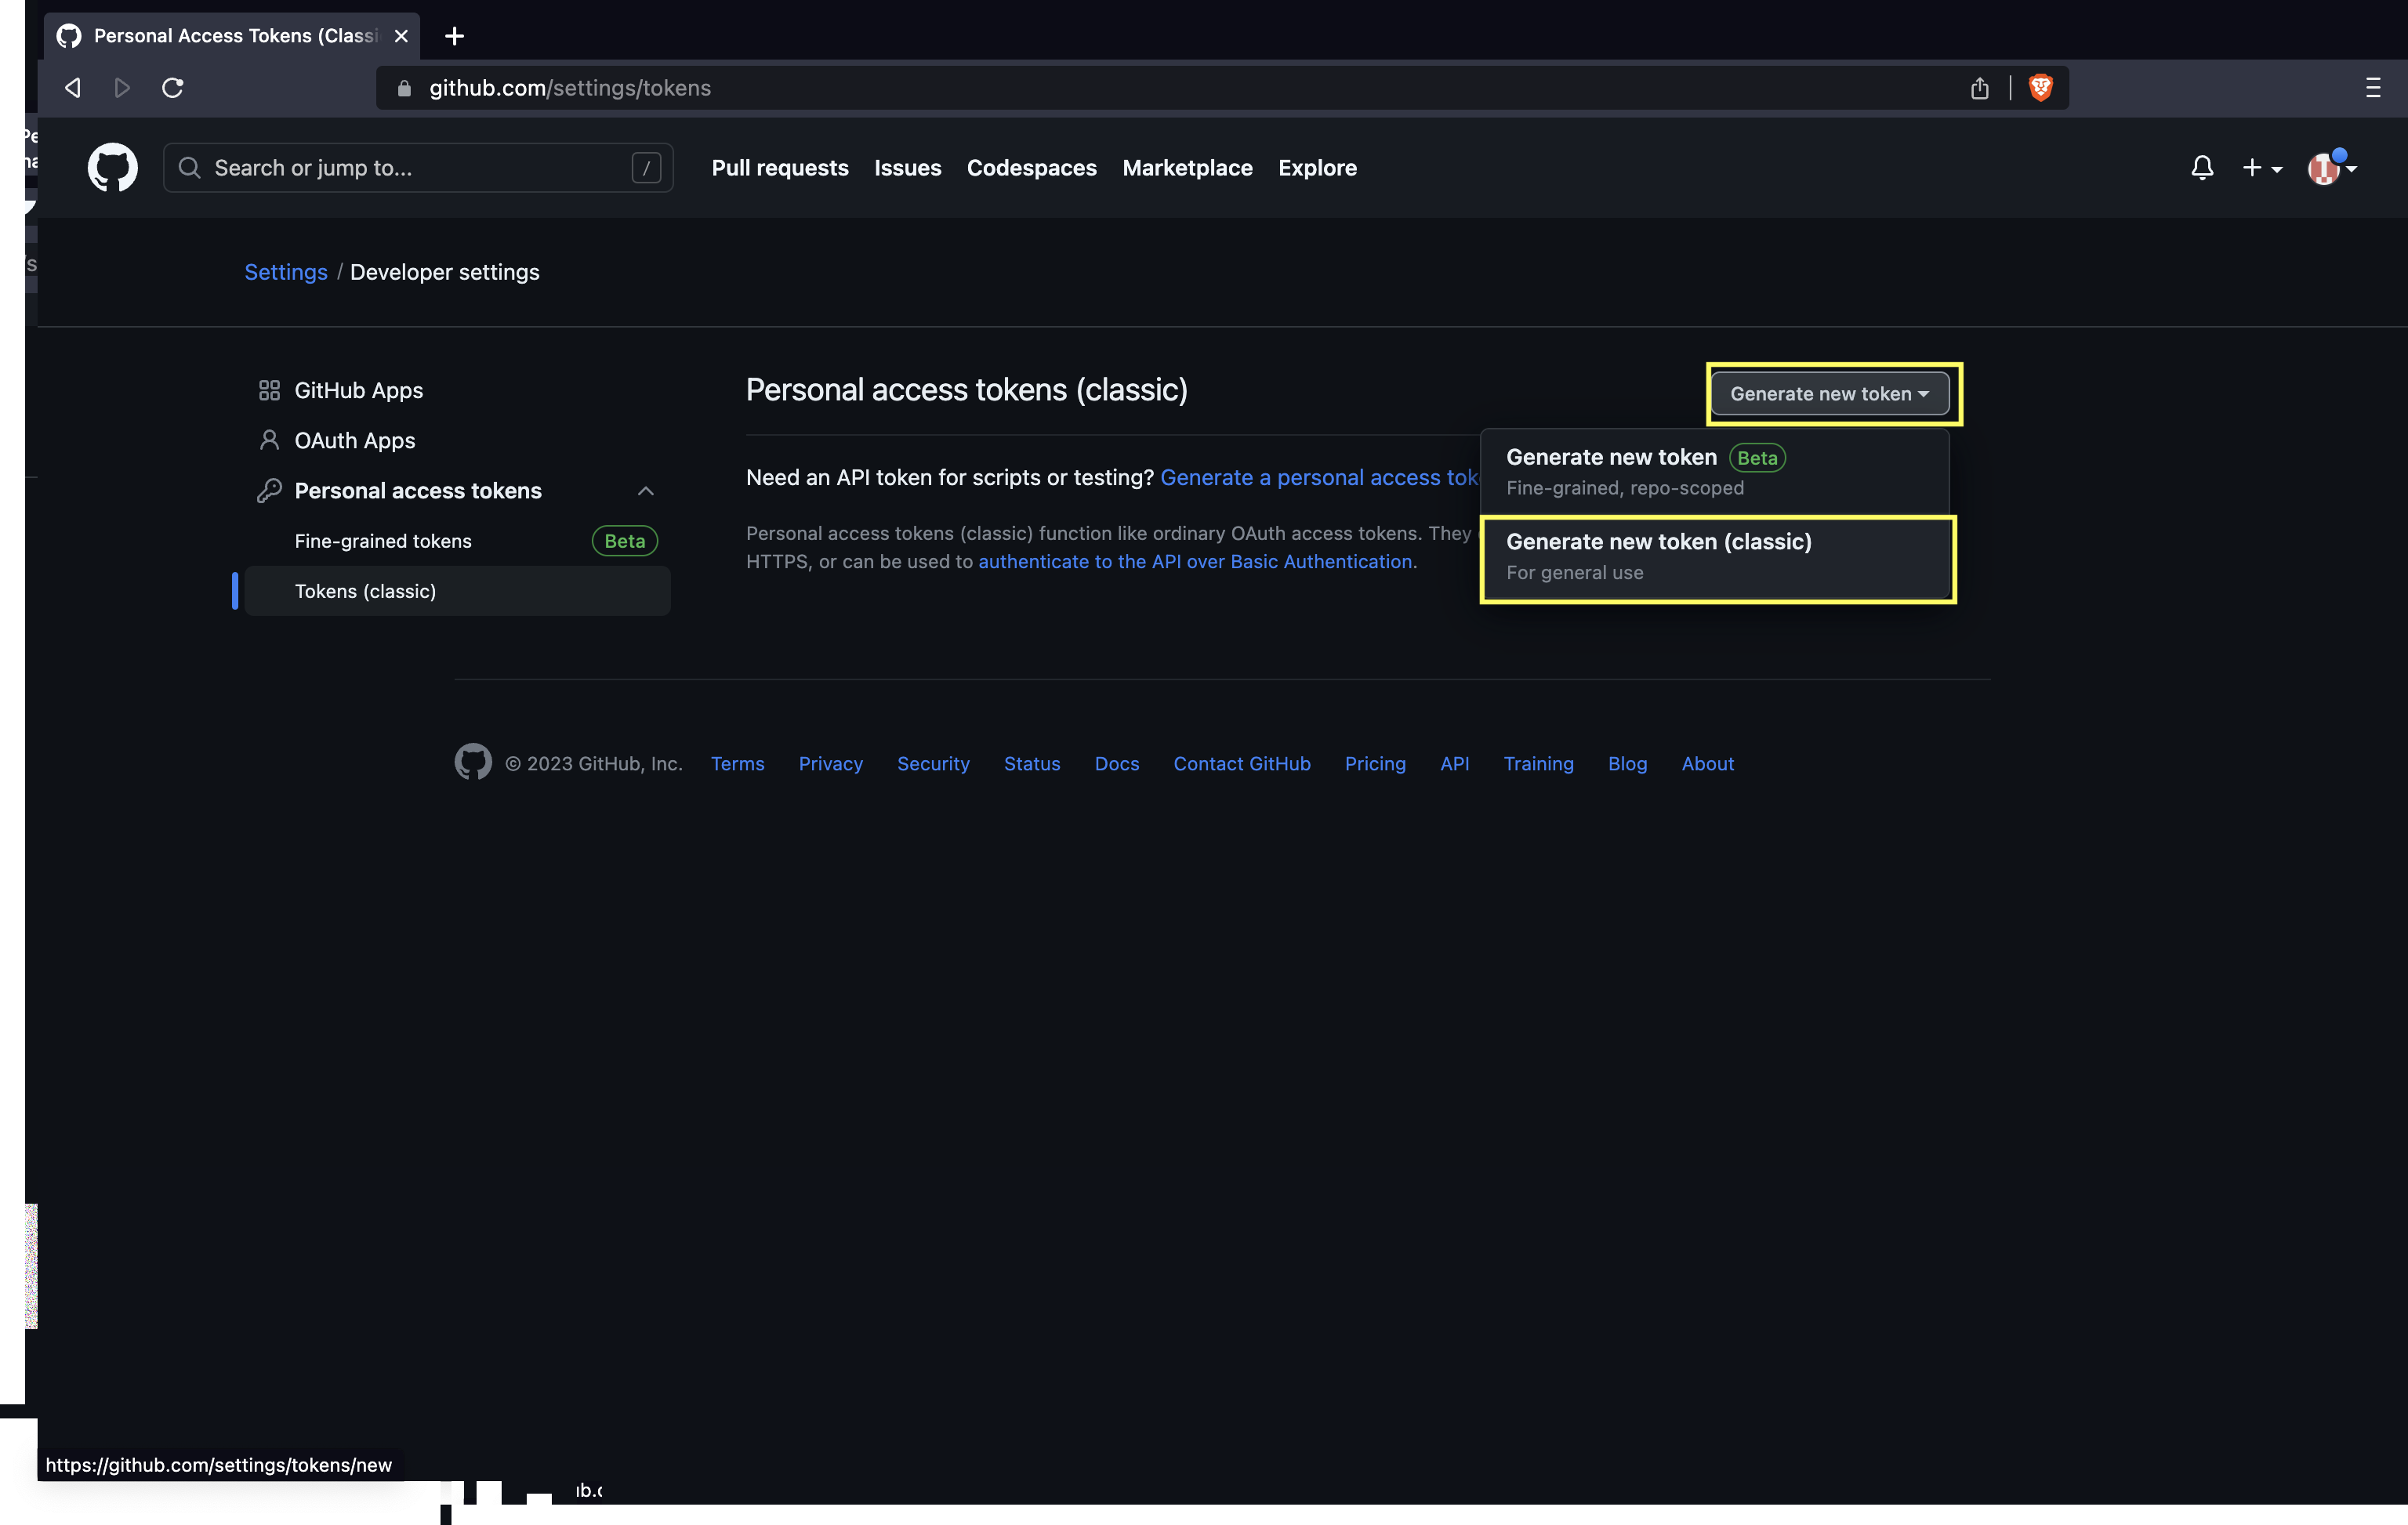
- Click on Generate token and then Generate new token (classic).
- Name the token and check the
repobox.
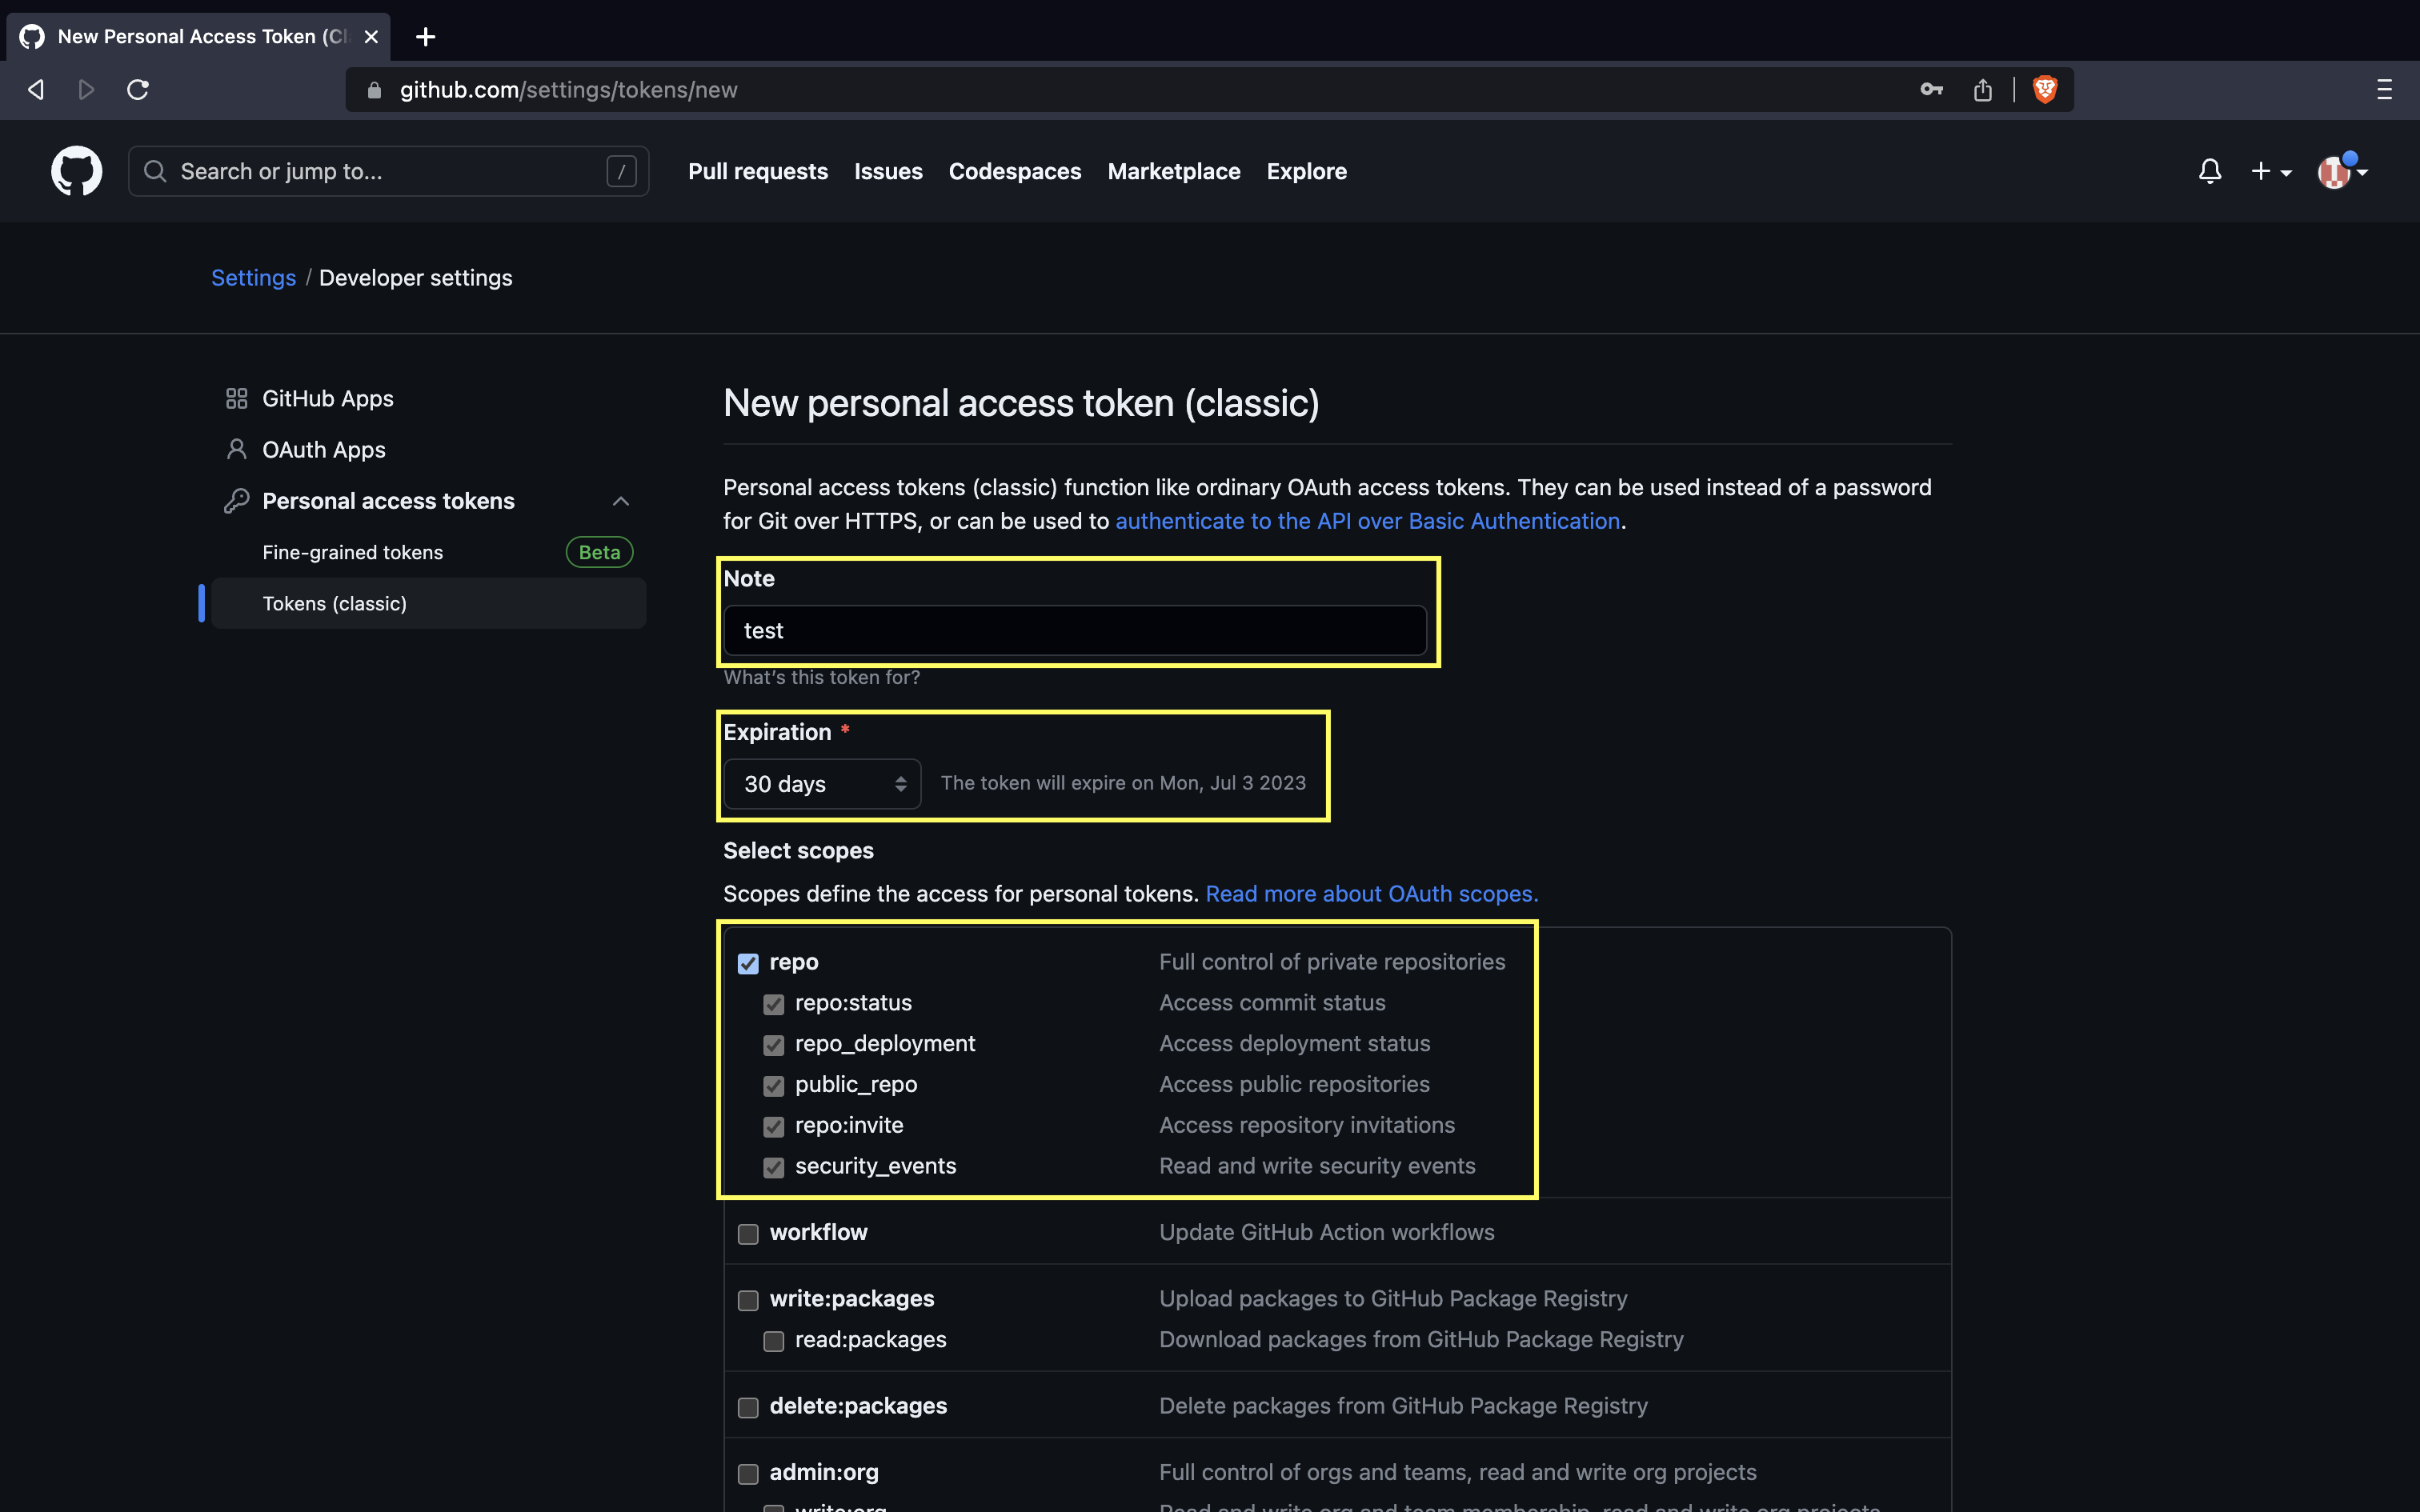
- Click Generate token.
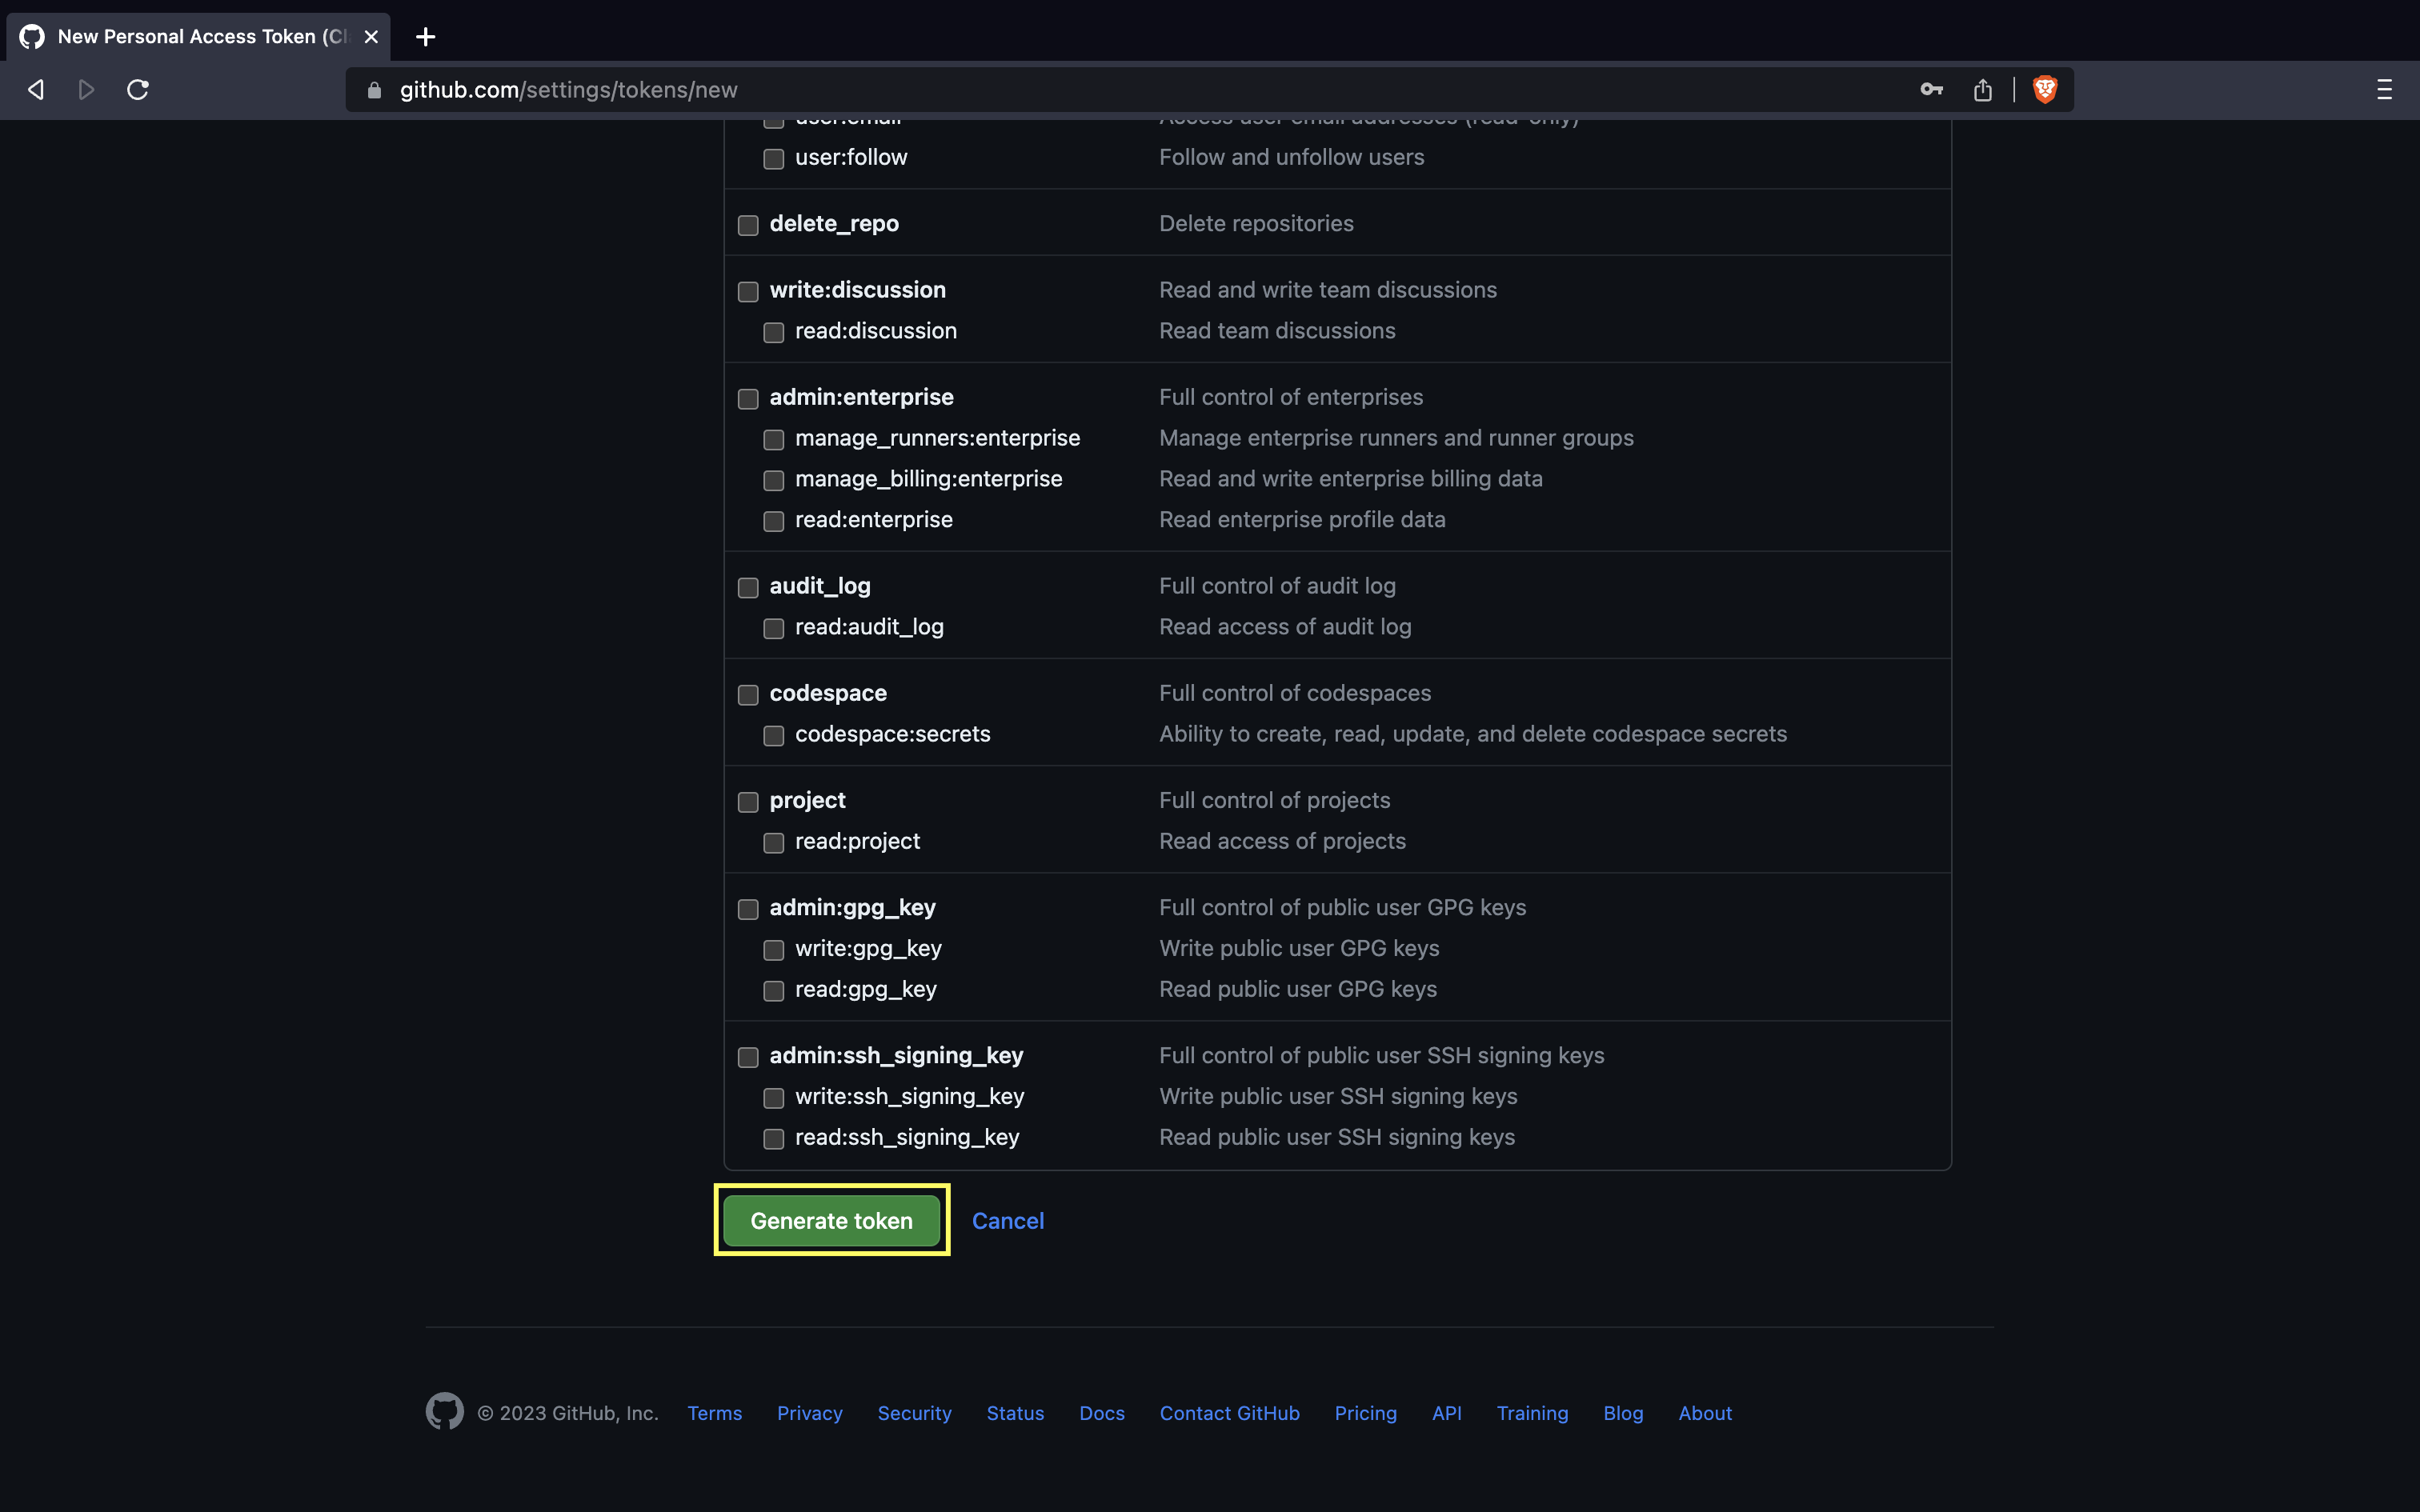
- The Personal access token(PAT) is shown only one time. Copy and save in secure place.
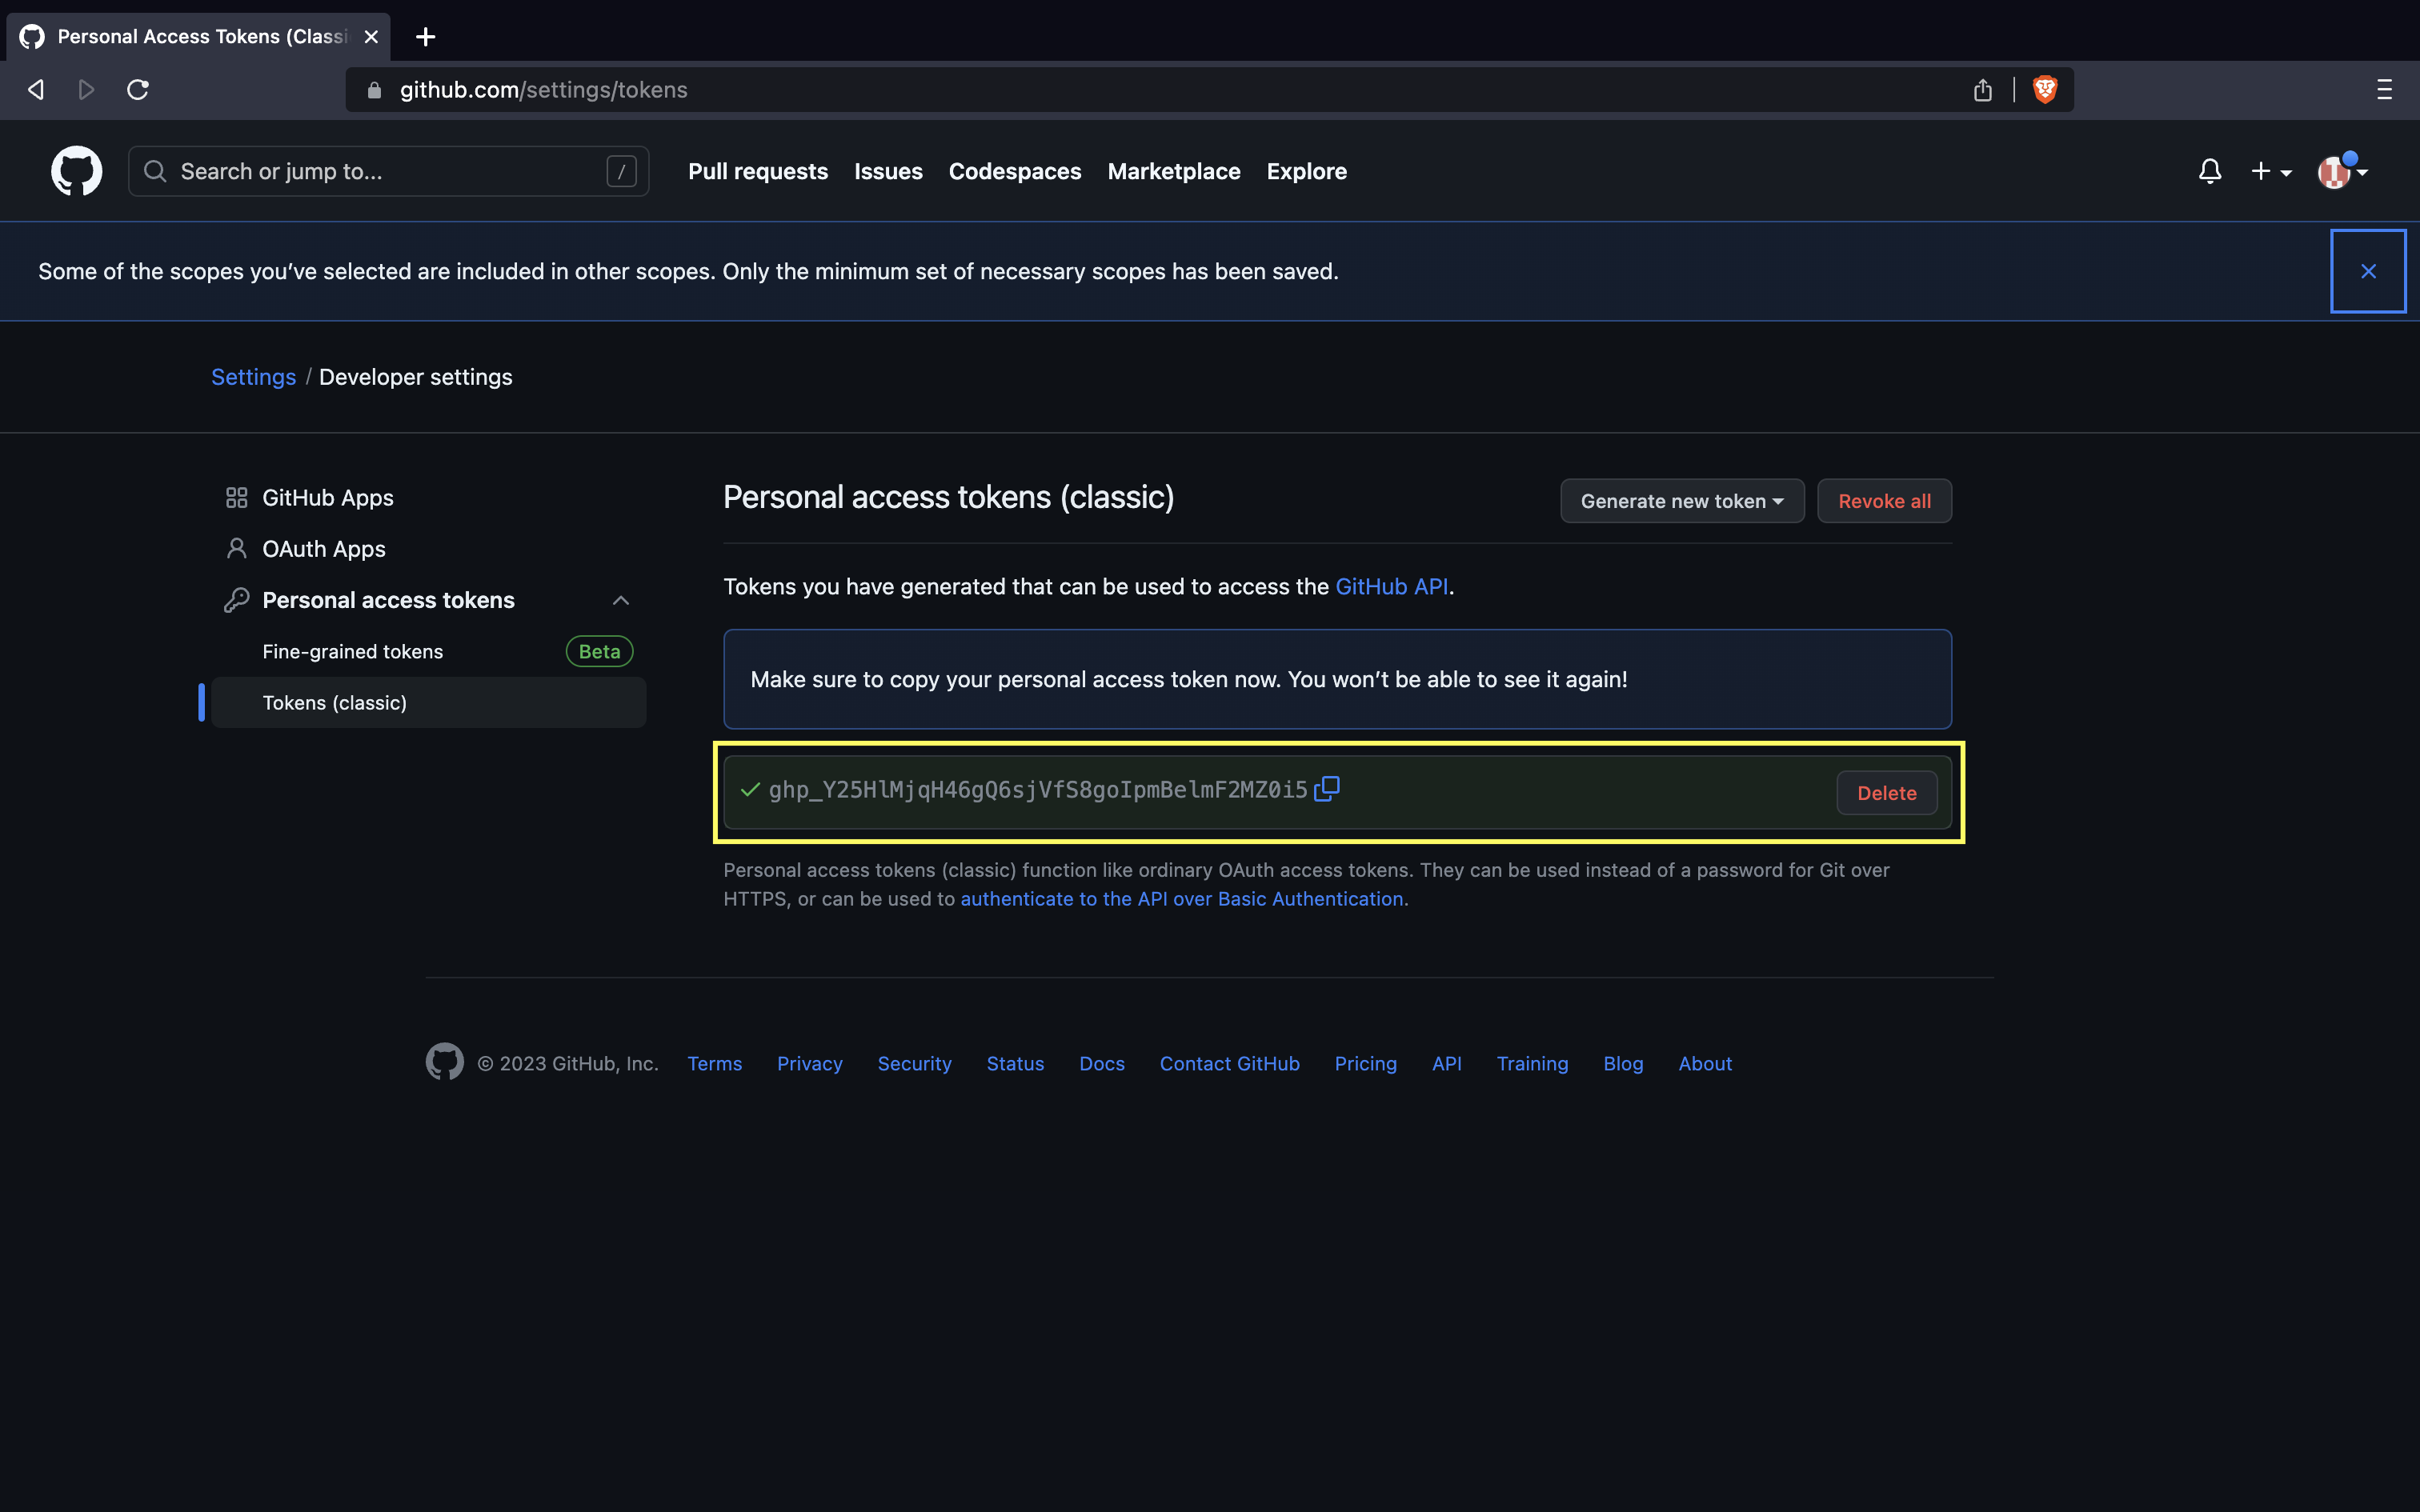
- Now, use the PAT as the password:
ubuntu@manikandan:~/firstproject$ git push origin main
Username for 'https://github.com': devopspilot2
Password for 'https://devopspilot2@github.com':
Enumerating objects: 4, done.
Counting objects: 100% (4/4), done.
Delta compression using up to 2 threads
Compressing objects: 100% (2/2), done.
Writing objects: 100% (3/3), 322 bytes | 322.00 KiB/s, done.
Total 3 (delta 0), reused 0 (delta 0), pack-reused 0
To https://github.com/devopspilot2/firstproject.git
   12664f9..d26925d  main -> main
The hello.txt is now pushed to GitHub!
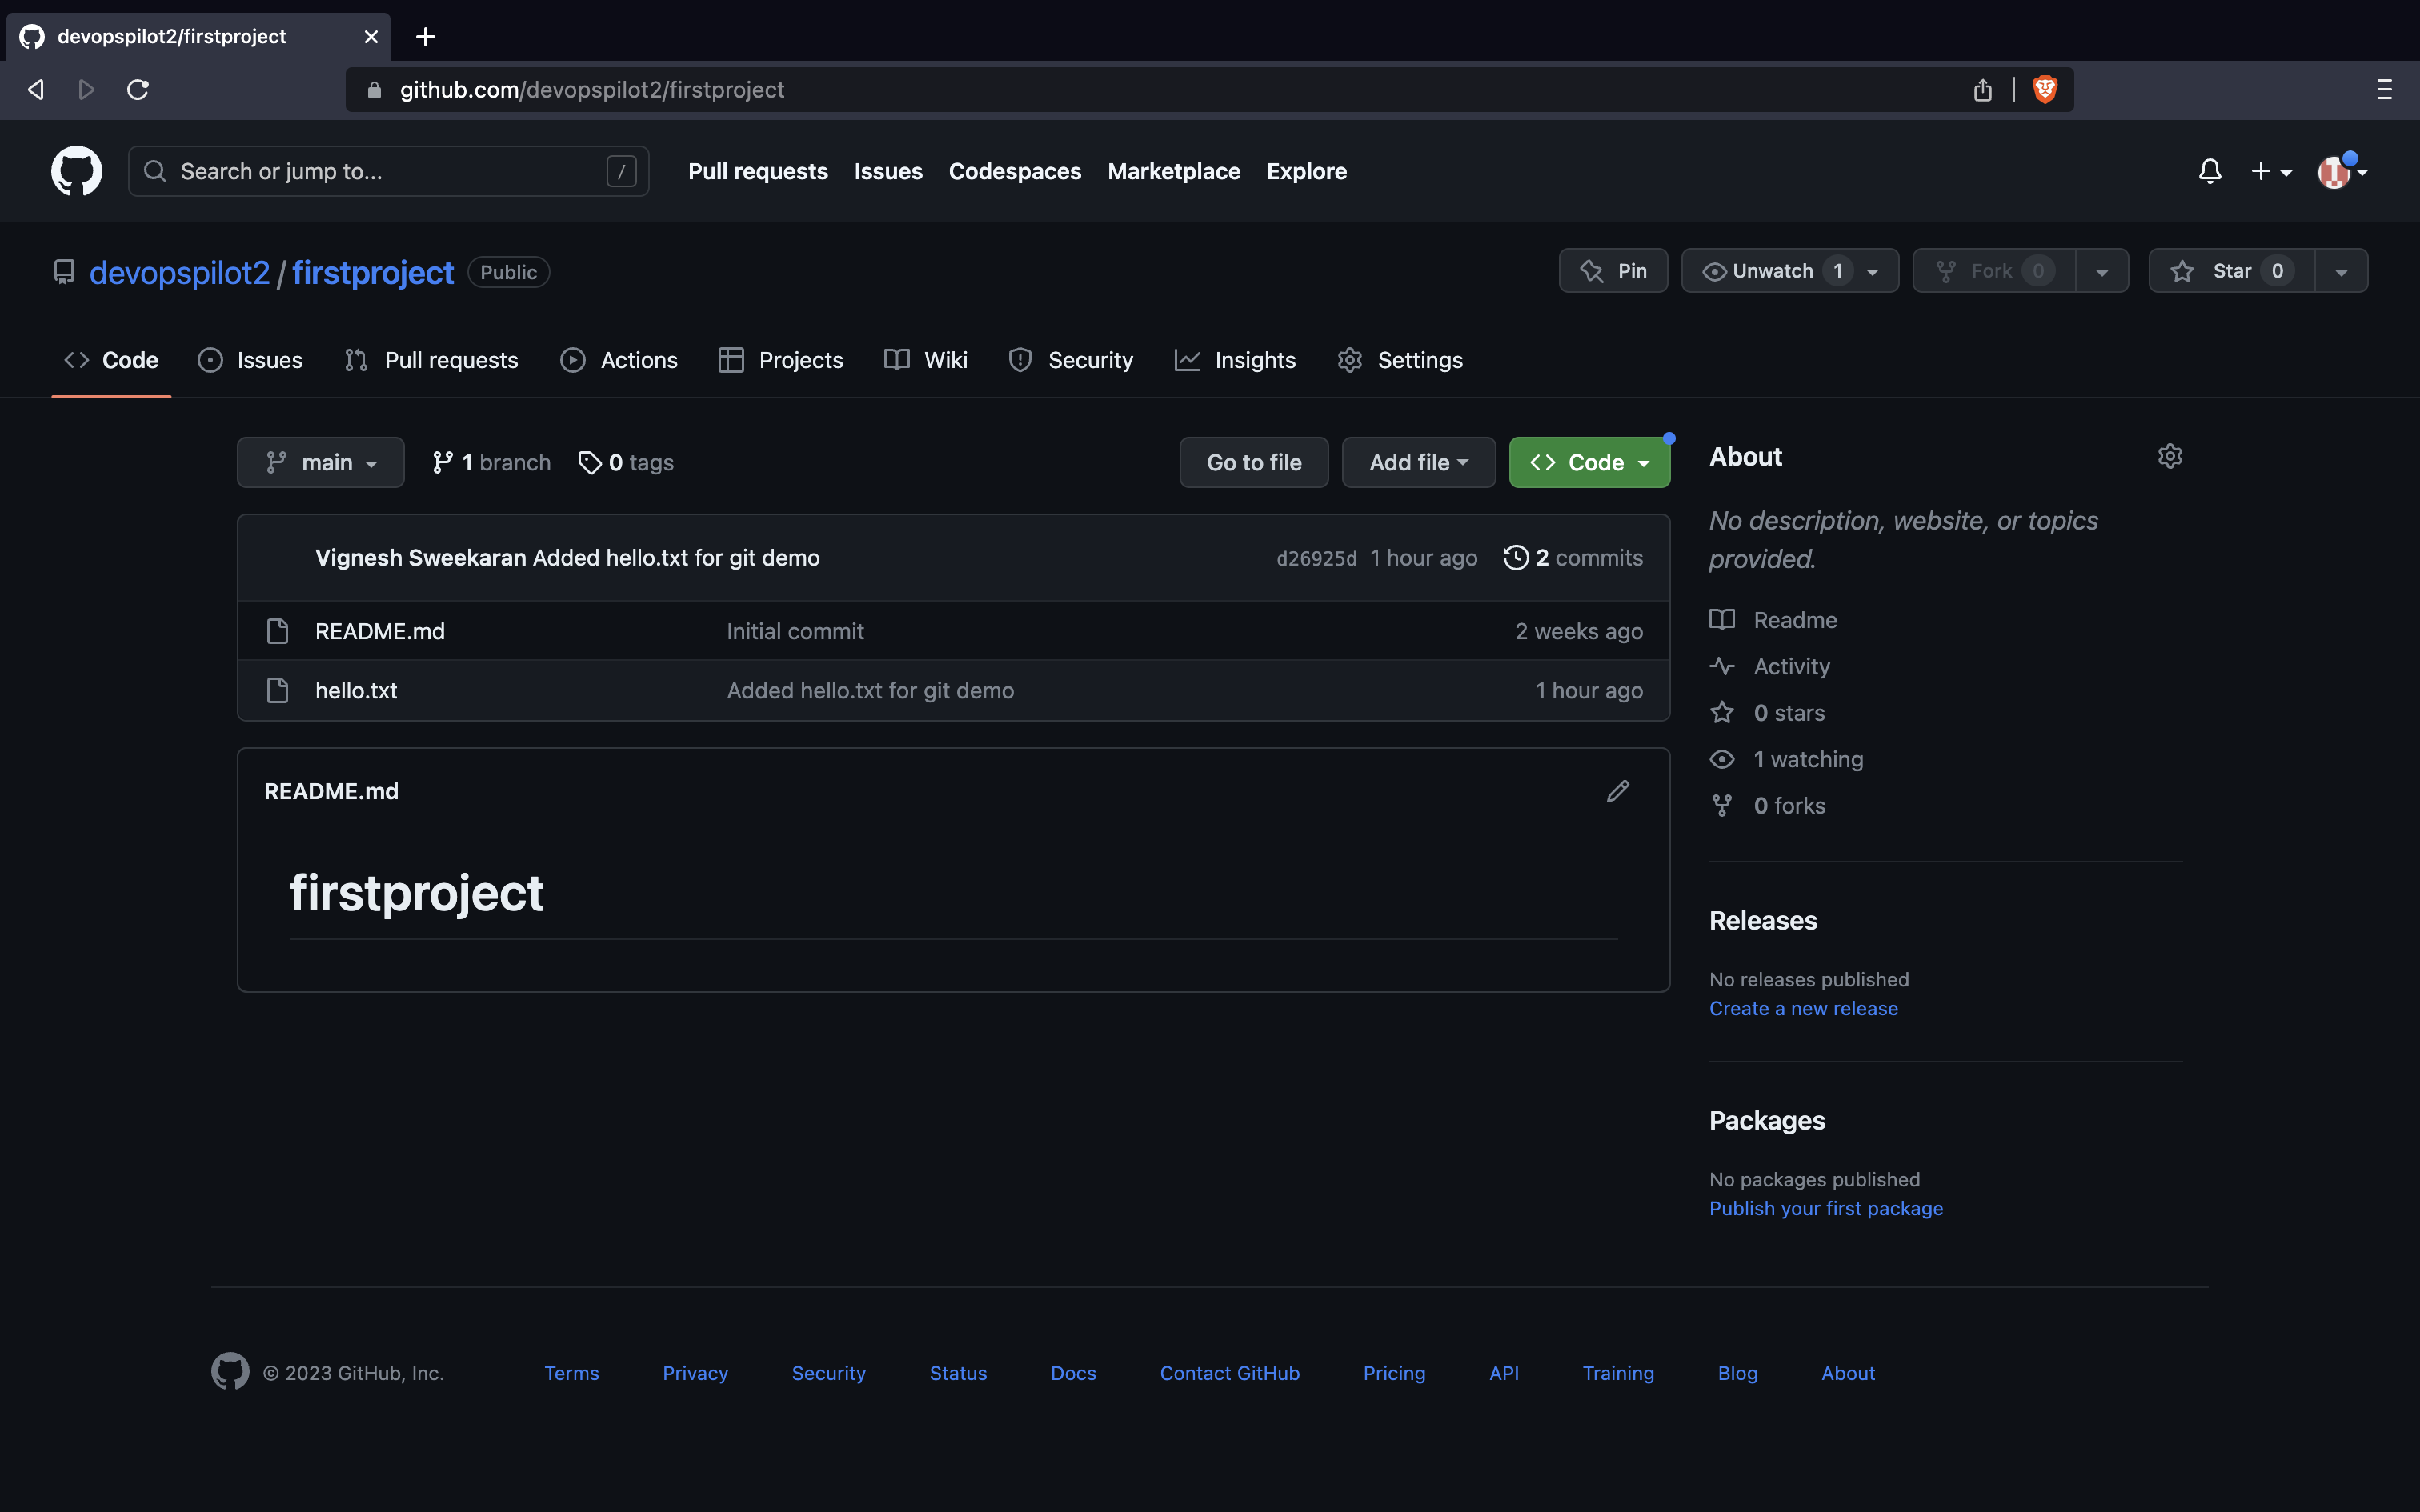
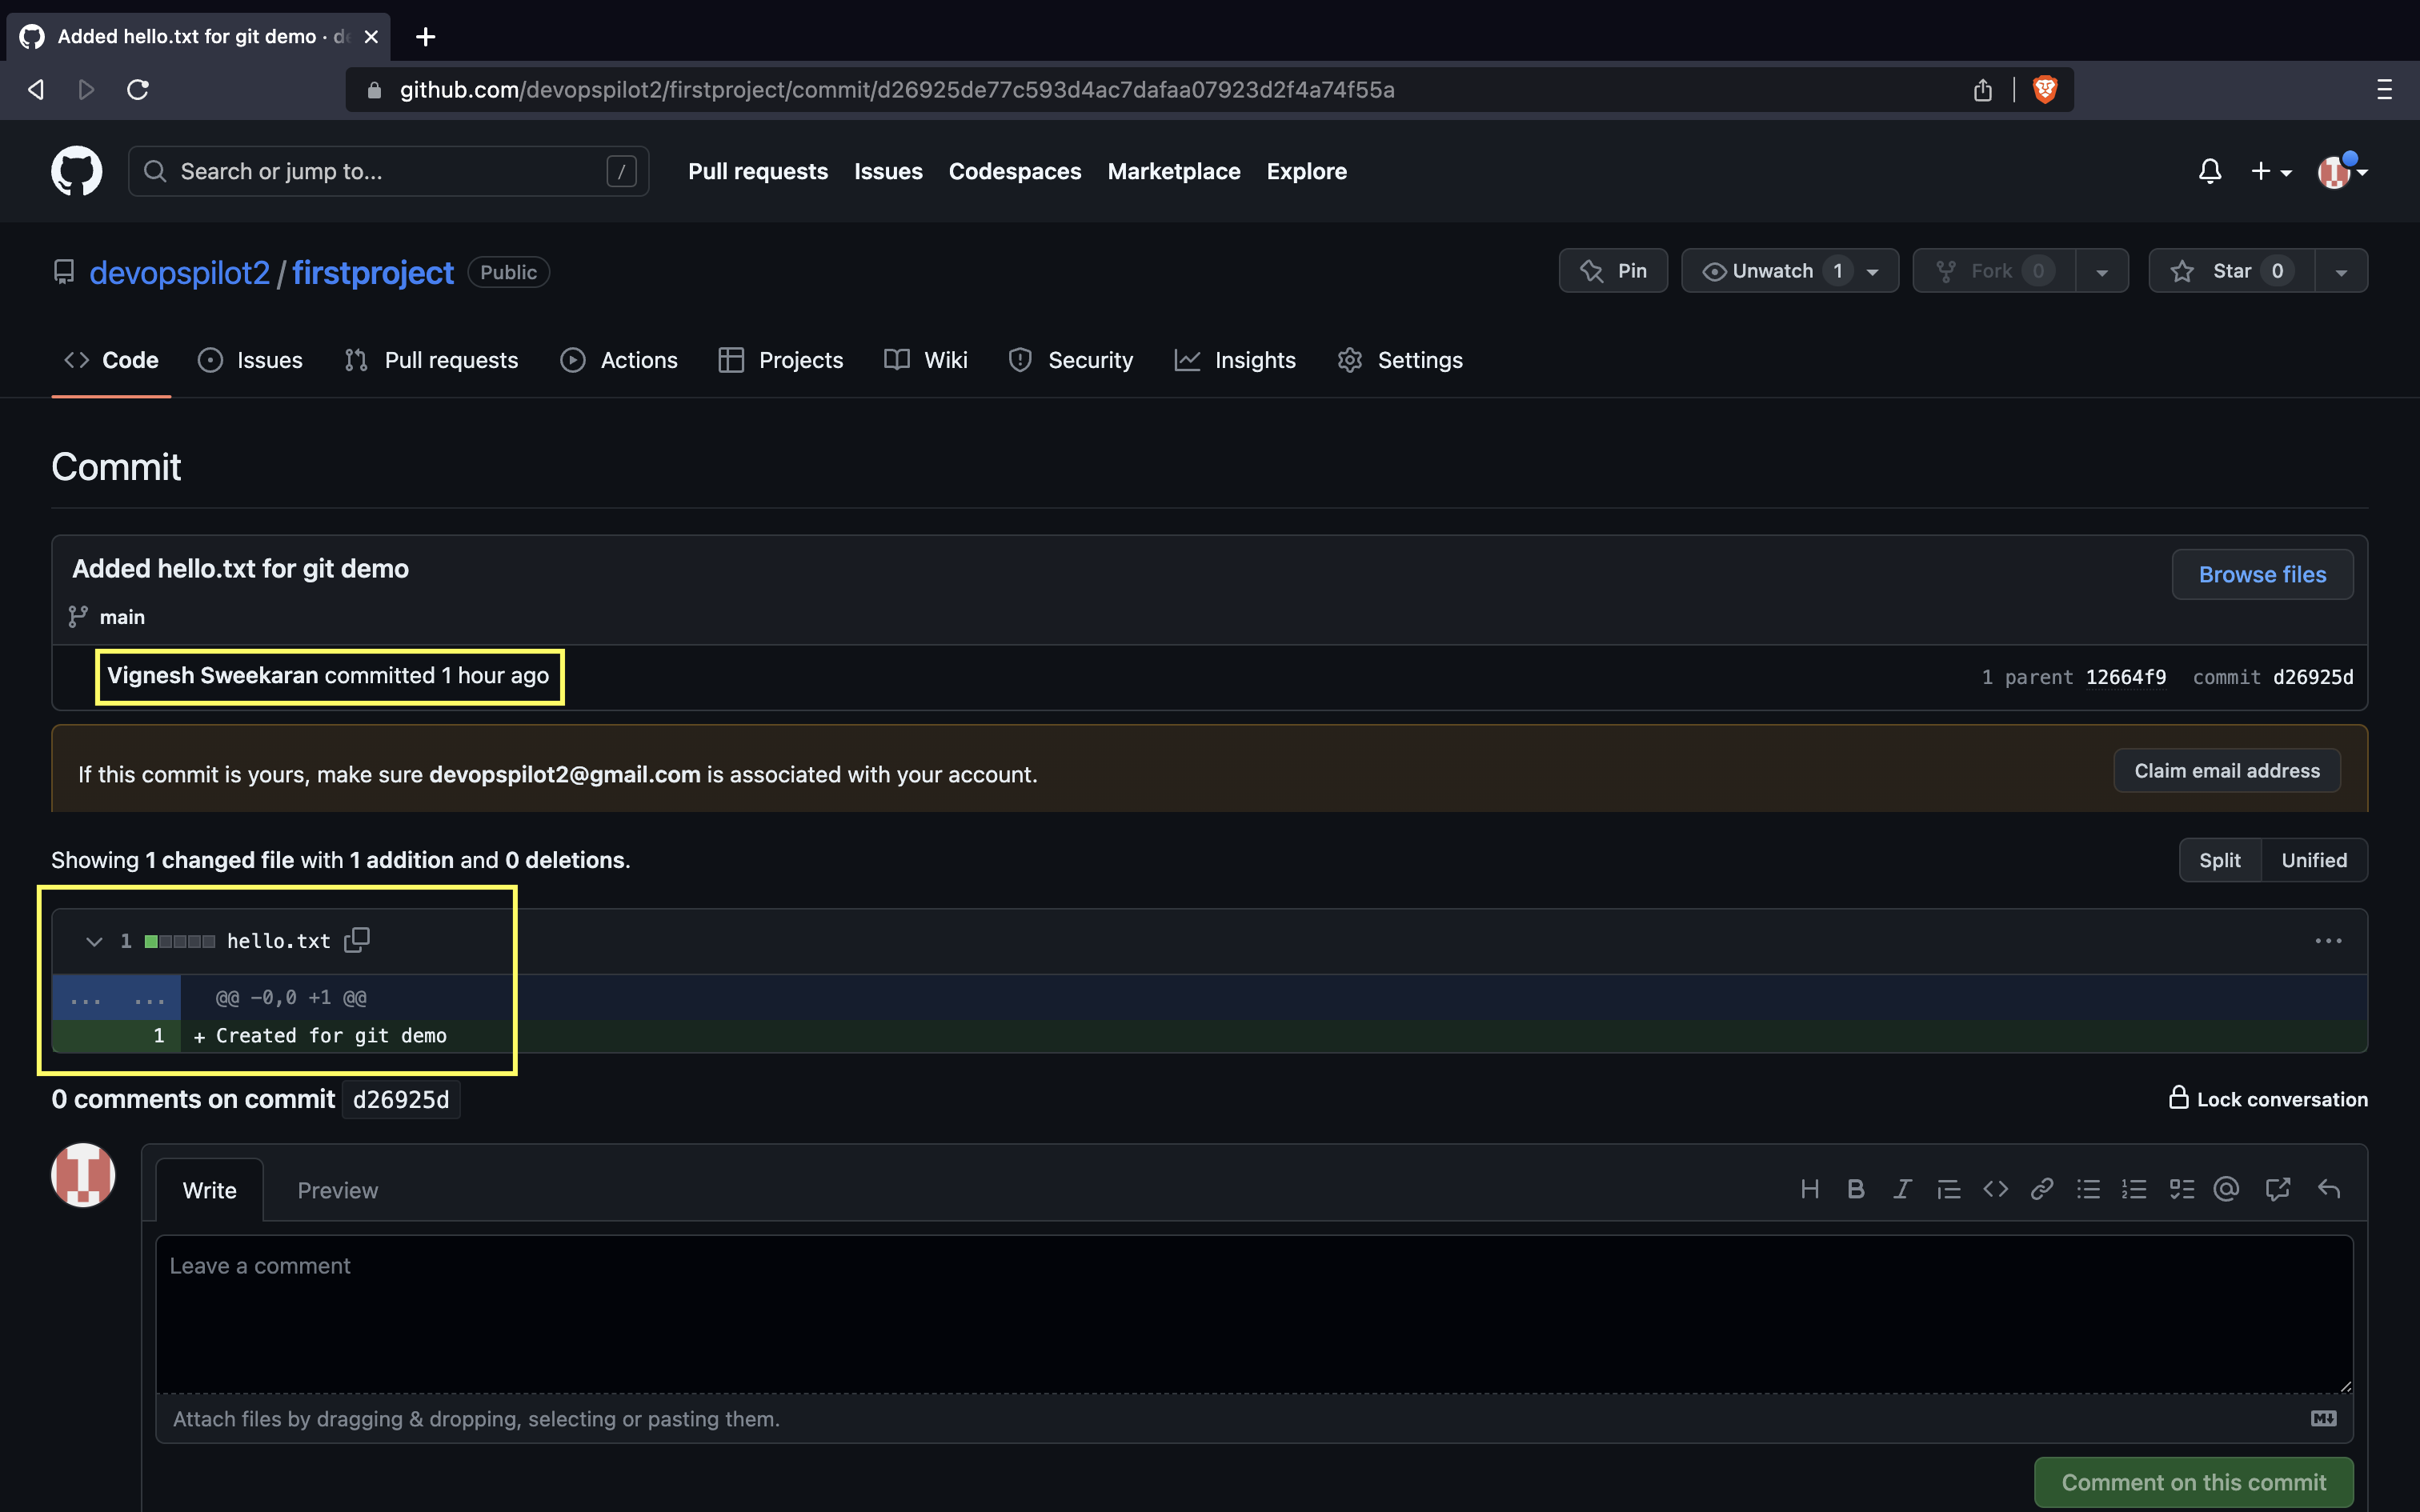
📜 View Commits in GitHub
Go to your firstproject repository and click on Commits.
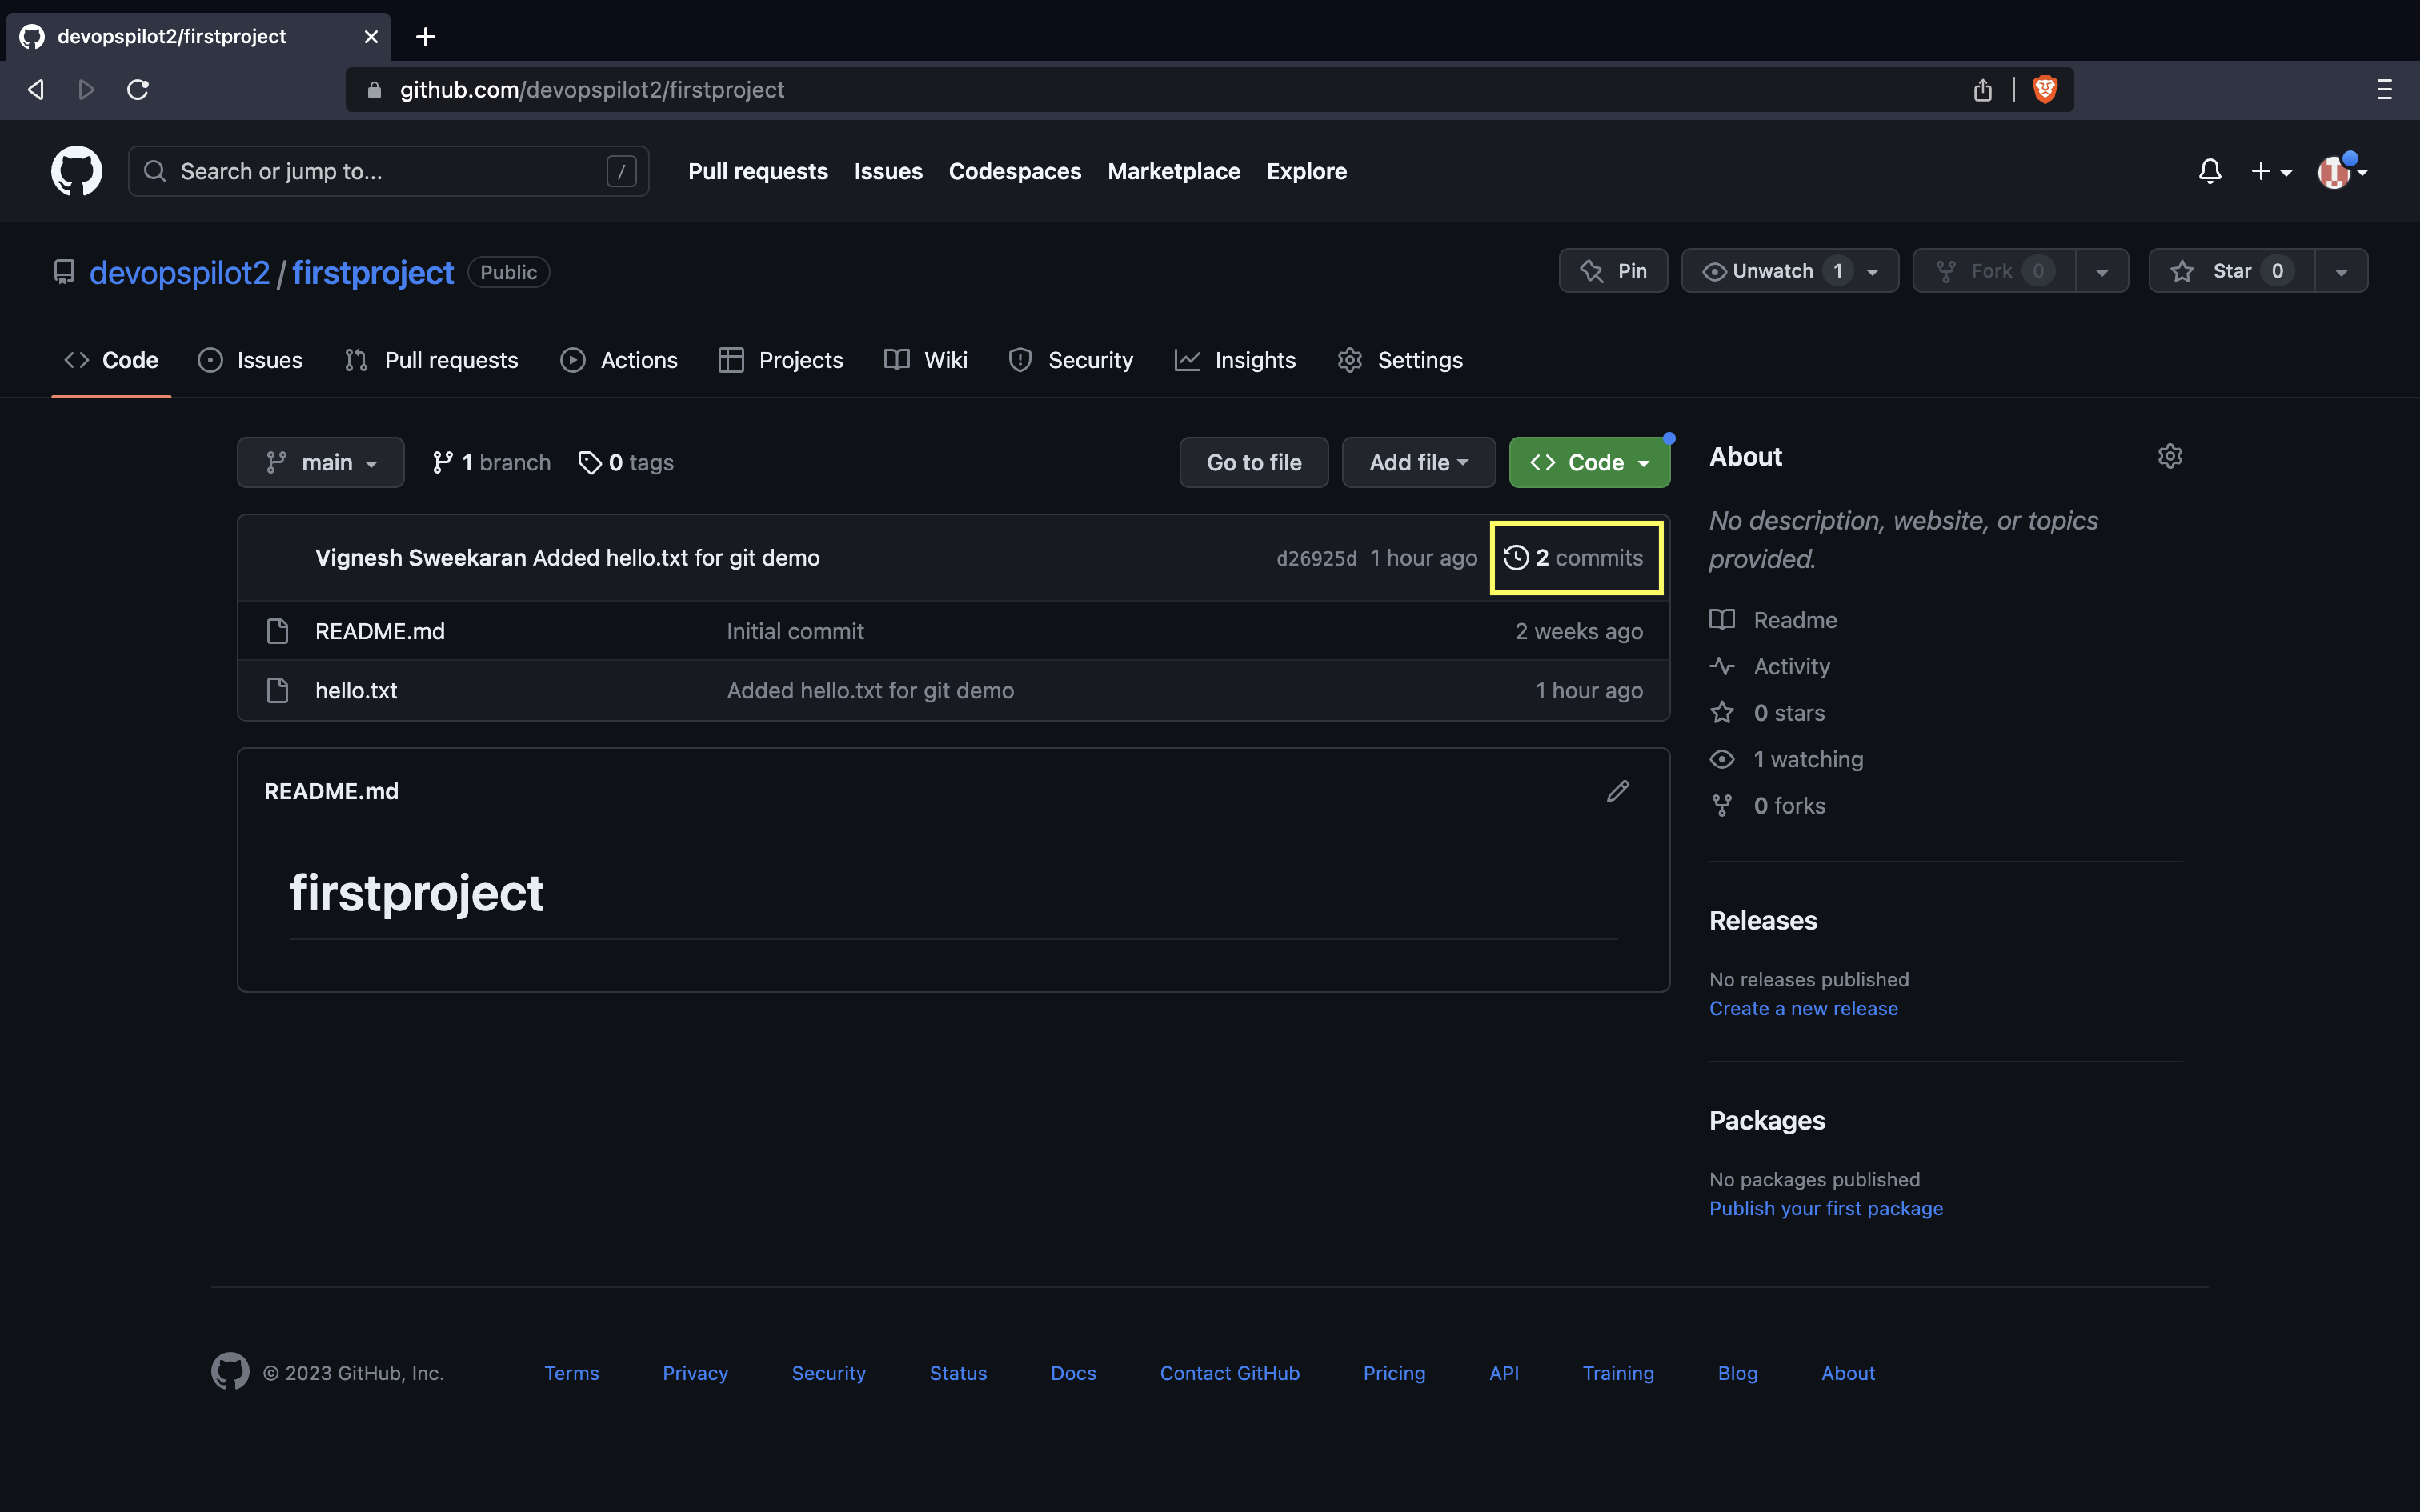
Here you can see all the commits pushed:
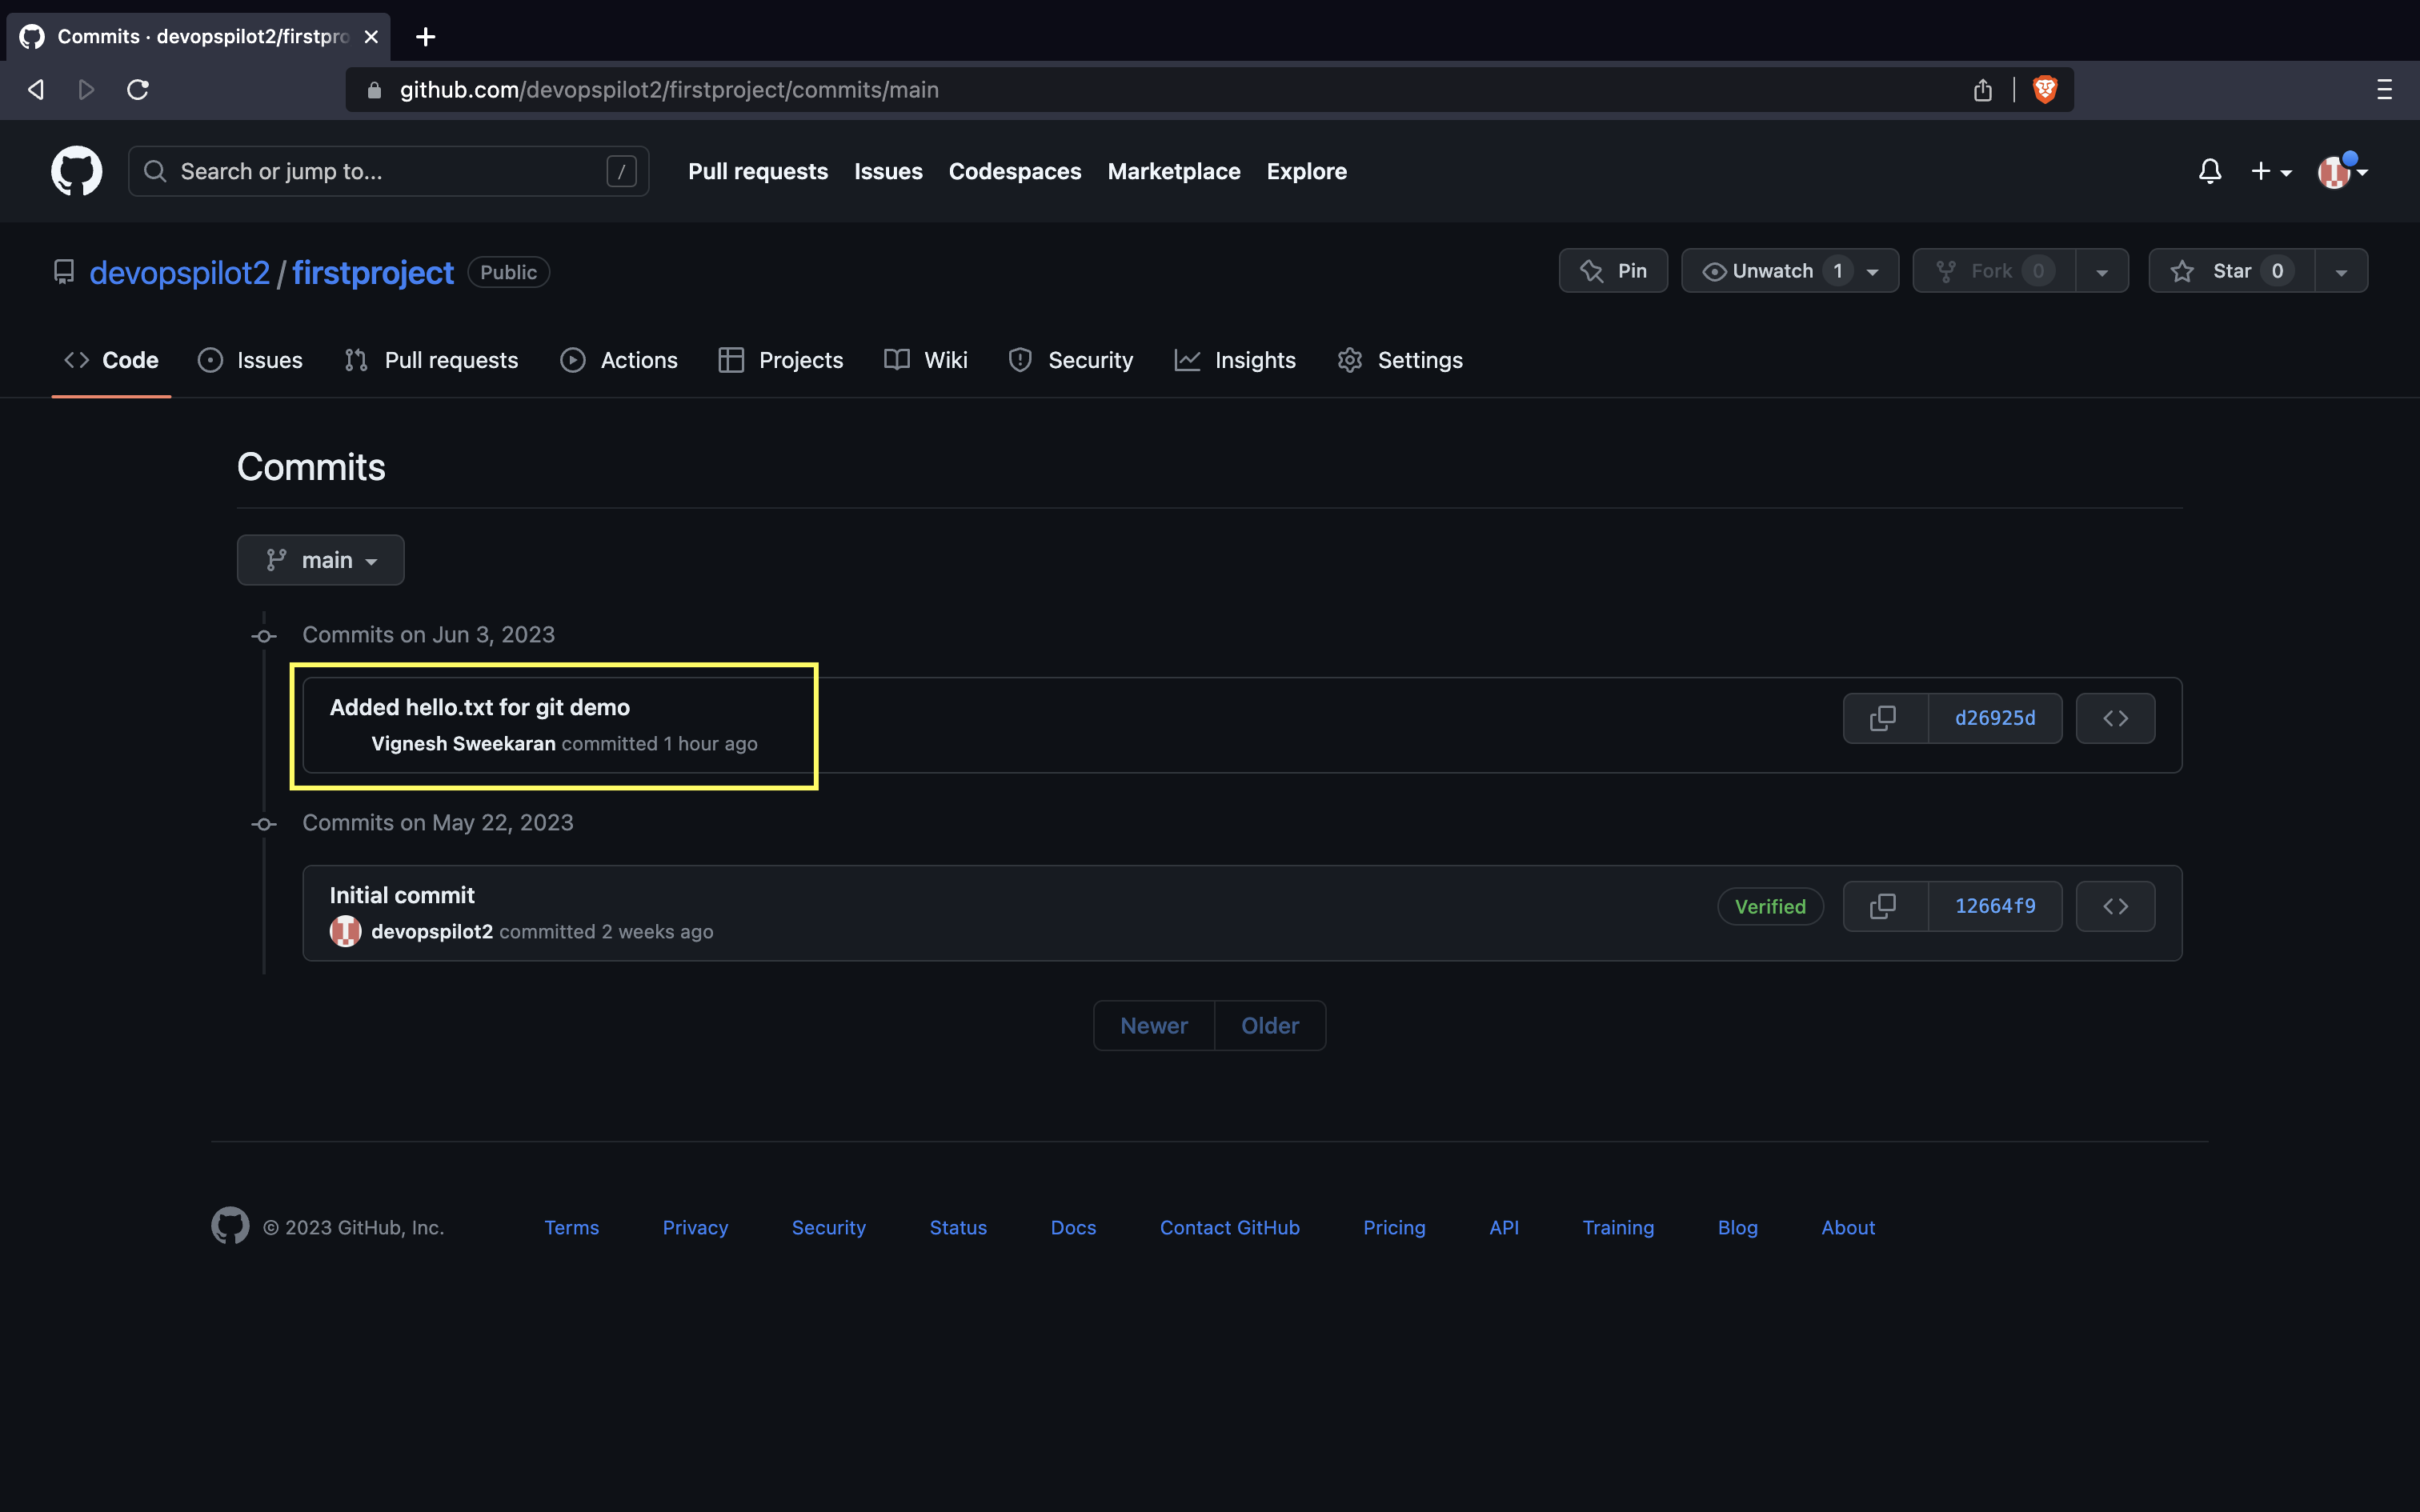
After clicking on one commit, you can see the changes made in the commit:
🎥 Watch on YouTube:

🧠 Quick Quiz — Workflow
What is the correct order of commands to save changes to GitHub?
📝 Want More Practice?
👉 Start Git Intermediate Quiz (20 Questions)
📬 DevopsPilot Weekly — Learn DevOps, Cloud & Gen AI the simple way.
👉 Subscribe here